 Creating Railings and Fences
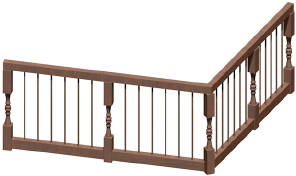
Creating Railings and FencesUse the Railing/Fence tool to create a railing or fence along a specified path using standard polyline creation modes. You can also use this tool to create railings and fences along a single, straight 3D line at any angle.
Alternatively, create a polyline and then select the Create Objects from Shapes command (see Creating Objects from Shapes).

Mode |
Description |
|
Polyline |
Draws a railing or fence along a path using the selected polyline creation options and the current preference settings; the object will be placed on the layer plane |
|
3D Line |
Draws a railing or fence along a line at any angle; snap the line to a site model object to follow the contours of hilly areas, for example |
|
Polyline creation options |
When Polyline mode is selected, selects the method for drawing the polyline upon which the railing or fence is based; see Creating Polylines |
|
Preferences |
Opens the Railing/Fence Settings dialog box, to set default parameters |
|
Symbol Selection list |
Select a symbol from the list to use for the fence or railing object when it is created; or select Current Settings to use the settings in the Railing/Fence Settings dialog box |

To create a railing or fence:
Click the Railing/Fence tool from the appropriate tool set:
● Landmark workspace: Site Planning or Furn/Fixtures tool set
● Architect workspace: Furn/Fixtures tool set
Click the drawing mode from the Tool bar:
● To draw the object along a polyline path, click Polyline, and then click the polyline option to use.
● To draw the object along a single, straight 3D line at any angle, click 3D Line.
Do one of the following:
● To use an existing fence symbol, select it from the Symbol Selection list on the Tool bar.
● To create a custom fence symbol, click Preferences from the Tool bar. The Railing/Fence Settings dialog box opens. Set the default properties for this session and click OK.
In 3D Line mode, click to set the start point, and click again to set the end point of the object.
In Polyline mode, click to set the start point; each subsequent click ends the current segment and begins the next. To complete the object, click the start point again (for a closed object), or double-click (for an open object).
► Click here for a video tip about this topic (internet access required).
To edit the parameters for an existing railing or fence, select the object and click Settings from the Object Info palette. Alternatively, right-click the object and select Properties from the context menu.
You can reshape a railing or fence that was drawn in Polyline mode. In Top/Plan view, double-click the object to activate the Reshape tool, or click the Reshape tool from the Basic palette. Drag the object handles to reshape the object, or add or delete vertices as described in Reshaping Objects.
~~~~~~~~~~~~~~~~~~~~~~~~~