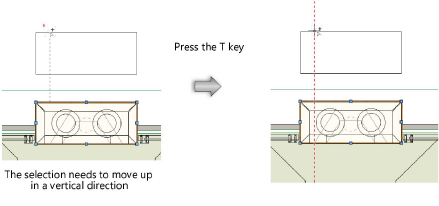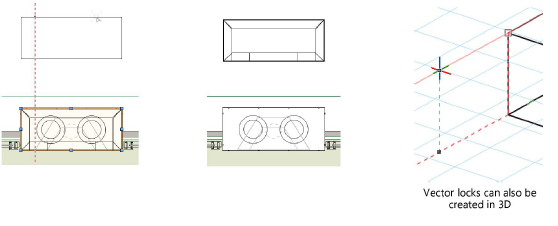
An extension line created from a smart point indicates a vector, or direction. This vector can be locked to facilitate drawing and moving objects, because the SmartCursor stays locked to that vector and serves as a guide for snapping along that vector.
To create a vector lock:
1. Select the tool for drawing, an object to move, or other operation that requires a vector lock.
It is helpful to display acquisition hints, which show when a vector lock can be set. This is a Vectorworks interactive preference; see Vectorworks preferences: Interactive pane.
2.During the operation, the feedback segment indicates the vector direction and the acquisition hint at the cursor indicates that a vector lock can be set. A vector lock can be set along a smart point extension line. As the cursor moves along the extension line, the lock acquisition hint shows that a vector lock can be set.
3.Press the T key to create the vector lock in the direction of the extension line, or press the G key to set the vector lock relative to a datum, using the Data bar.
The vector lock displays. The appearance of vector locks can be set as described in Configuring interactive display.

4.The SmartCursor locks to the vector and the operation is snapped along the desired direction.

The Data bar can create a vector lock along a specific direction. Enter values in the Data bar as described in Using the Data bar. A vector lock displays, and the SmartCursor only snaps to points on the locked line.

~~~~~~~~~~~~~~~~~~~~~~~~~