 Placing distributorsPlacing distributors
Tool |
Tool set |
Distributor
|
Preview |
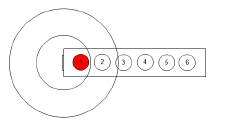
The Distributor tool places power distribution objects such as power distribution racks, dimmer racks, breakout boxes, twofers, and so on. Distributor objects have one input and up to 16 outputs, and they split power or signals to the cables.
A distributor object is considered a load, and can be included in load calculations (Braceworks required). Distributors can be labeled with data tag objects; see Using data tags.

Mode |
Description |
Distributor Symbol |
Opens the Resource Selector to select a distributor resource for placement; double-click a resource to activate it |
Automatic Numbering |
Enables automatic numbering of distributors as they are placed |
Numbering Preferences |
Set the default parameters for automatic numbering of distributors |
To insert a distributor:
1. Click the tool. From the Tool bar, enable Automatic Numbering if desired, and specify the Numbering Preferences. See Automatic numbering preferences.
2.Click Distributor Symbol on the Tool bar to select a resource from the Resource Selector.
If you do not select a distributor resource, a rectangle is placed.
3.Click to place the distributor in the drawing. The object can be attached to a rigging object; see Concept: Attaching loads to rigging objects.
The parameters can be edited later from the Object Info palette.
![]() Click
to show/hide the parameters.
Click
to show/hide the parameters.
Distributors can also use the data tag for labeling; see Using data tags.
~~~~~~~~~~~~~~~~~~~~~~~~~
