Command |
Path |
Create Plug-In Style |
● Tools ● Context menu |
Create a plug-in-object style to lock some object parameters while leaving others variable; see Concept: Plug-in object styles.
To create a plug-in object style:
1. Select an unstyled instance of the plug-in object in the drawing area.
2.Select the command, or right-click on the unstyled plug-in object and select New Plug-in Style from Unstyled Plug-in from the context menu.
The Create Symbol dialog box opens.
3.Select the destination folder for the plug-in object style.
Either the <Object> Style dialog box or the Plug-in Object Style dialog box opens, populated with the parameter values of the selected instance. The steps to create a plug-in style are slightly different, depending on which dialog box opens.
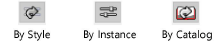
4.Set the By Style, By Instance, and By Catalog setting for each parameter and edit the value of each parameter if needed, as described in these sections:
● The <Object> Style dialog box displays the By Style, By Instance, and for some objects By Catalog toggle buttons beside the parameters; see Custom plug-in style dialog boxes.
● The Plug-in Object Style dialog box does not display the By Style and By Instance toggle buttons beside the parameters; see Standard plug-in object style dialog boxes.
5.You can control some plug-in object style settings regardless of whether the plug-in object is, for example, a window or title block border. See Additional plug-in object style and instance options for setting options including the plug-in style’s class and the 2D component and cut plane display.
For plug-in object styles that use 2D components, see Creating 2D components for symbol definitions and plug-in objects for additional steps relating to defining the components as part of the style.
Custom plug-in <Object> Style dialog boxes appear almost identical to the object preferences or settings dialog box that is used to insert and edit the object, with the exception of the settings related to defining a plug-in object style.
1. Enter the Style Name, which must be unique in the file.
2.If the plug-in object provides the option to use catalog settings (see Concept: Plug-in object styles and catalog items), catalog-related controls display. If not, skip to step 9.

If a catalog item is already associated with the style, text next to Select from Catalog describes the item.
3.To attach a catalog, change catalogs, or detach the current catalog from the style, click Catalog. To choose a different item from the same catalog, skip to step 5.
The Select Catalog dialog box opens.
![]() Click
to show/hide the parameters.
Click
to show/hide the parameters.
If a catalog item was previously attached to the style, the newly attached catalog is searched for an item with parameters that exactly match placed instances using the style. If a match is found, styled instances automatically use the new catalog item. If a match is not found, the previous catalog parameters remain until an item from the new catalog is selected.
4.If this is the first time the current catalog has been selected, the Catalog dialog box opens automatically. Otherwise, click Select from Catalog.
The Catalog dialog box opens; the name of the current catalog displays in the title bar.
5.Select the catalog item to use for the plug-in object style, as described in Selecting catalog items for plug-in object styles.
6.Click OK to return to the <Object> Style dialog box.
7.Click the By Style/Instance button next to Select from Catalog to establish whether the catalog selection itself is by style or by instance.
●  Set
the catalog item by style to ensure that all objects using that style
use the same catalog item.
Set
the catalog item by style to ensure that all objects using that style
use the same catalog item.
●  Set
the catalog item by instance if greater flexibility is needed. For example,
a project may require different sizes of the same window type; this would
require a different catalog item for each instance.
Set
the catalog item by instance if greater flexibility is needed. For example,
a project may require different sizes of the same window type; this would
require a different catalog item for each instance.
Regardless of whether the catalog item itself is a style or instance parameter, the individual parameters set by catalog are defined by the selected catalog item and cannot be changed by the project manager or designer.
8.For each parameter that is not defined by catalog, click the By Style/Instance button and toggle to the desired setting.
To set all the non-catalog parameters on the active pane of the dialog box to By Style or By Instance, click All By Style and toggle to the desired style/instance setting; repeat for other panes as necessary.
To import settings from a previously saved style, click Import <Category> Settings; styles from the current file and default content folders are available. Choose the style for import. Settings are imported for the active pane only; repeat for other panes as necessary.
A plug-in object style’s By Style/Instance setting can be established only from the <Object> Style dialog box, not from the object’s settings, preferences, or properties dialog boxes. On the object settings/preferences/properties dialog box, the style/instance icons are for informational purposes only. You can change these settings by Editing plug-in object styles; doing so will alter every object in the file that uses the style, including those already inserted in the drawing.
9.Specify the parameter values. For style parameters, this value is fixed for every object that uses this plug-in object style and cannot be edited from the object’s settings, preferences, or properties dialog box. Instance parameter values set here are the default values for newly placed instances; they can be edited for each instance from the object’s settings, preferences, or properties dialog box, and from the Object Info palette.
For the settings or preferences dialog box accessed from the Preferences button on the Tool bar, changing the values of instance parameters sets a new default for subsequently inserted objects, but does not change the plug-in style’s default settings.
The standard Plug-in Object Style dialog box appears identical to the object properties dialog box that is used to insert and edit the object, with the exception of the settings related to defining a plug-in object style.
1. Enter the Style Name, which must be unique in the file.
2.Click Plug-in Style/Instance Settings.
The Plug-in Style/Instance Settings dialog box opens, with the Style Name displayed.
3.If the plug-in object provides the option to use catalog settings (see Concept: Plug-in object styles and catalog items), catalog-related controls are available. If not, skip to step 9.

If a catalog item is already associated with the style, the text next to Select from Catalog describes the item.
4.To use a catalog item for the plug-in object style, select Use Catalog, and select a catalog from the list.
5.Click Select from Catalog.
The Catalog dialog box opens; the name of the current catalog displays in the title bar.
6.Select the catalog item to use for the plug-in object style, as described in Selecting catalog items for plug-in object styles.
7.Click OK to return to the Plug-in Object Style dialog box.
8.Click the By Style/Instance button next to Select from Catalog to establish whether the catalog selection itself is by style or by instance.
●  Set
the catalog item by style to ensure that all objects using that style
use the same catalog item.
Set
the catalog item by style to ensure that all objects using that style
use the same catalog item.
●  Set
the catalog item by instance if greater flexibility is needed. For example,
a project may require different sizes of the same cabinet type; this would
require a different catalog item for each instance.
Set
the catalog item by instance if greater flexibility is needed. For example,
a project may require different sizes of the same cabinet type; this would
require a different catalog item for each instance.
Regardless of whether the catalog item itself is a style or instance parameter, the individual parameters set by catalog are defined by the selected catalog item and cannot be changed by the project manager or designer.
9.The dialog box displays the Parameter Name list and a By Style/Instance toggle button next to each name. For each parameter that is not defined by catalog, click the By Style/Instance button next to each parameter name, and toggle to the desired setting.
A plug-in object style’s By Style/Instance setting can be established only from the Plug-in Style/Instance Settings dialog box, not from the create object or object properties dialog box. You can change these settings by Editing plug-in object styles; doing so will alter every object in the file that uses the style, including those already inserted in the drawing.
10.Click OK to return to the Plug-in Object Style dialog box.
11.Specify the parameter values. For style parameters, this value is fixed for every object that uses this plug-in object style and cannot be edited from the object’s settings, preferences, or properties dialog box. Instance parameter values set here are the default values for newly placed instances; they can be edited for each instance from the object properties dialog box, and from the Object Info palette.
For the object properties dialog box accessed from the Preferences button on the Tool bar, changing the values of instance parameters sets a new default for subsequently inserted objects, but does not change the plug-in style’s default settings.
~~~~~~~~~~~~~~~~~~~~~~~~~