 Database connection
|
Command |
Path |
|
Manage Databases |
Tools > Database |
In the Vectorworks file, connect the database to the file and then select a Key identifier for each data source.
To establish the connection between the database and the Vectorworks file:
Open the Vectorworks drawing. Database connection information is saved in the Vectorworks file.
Select the command.
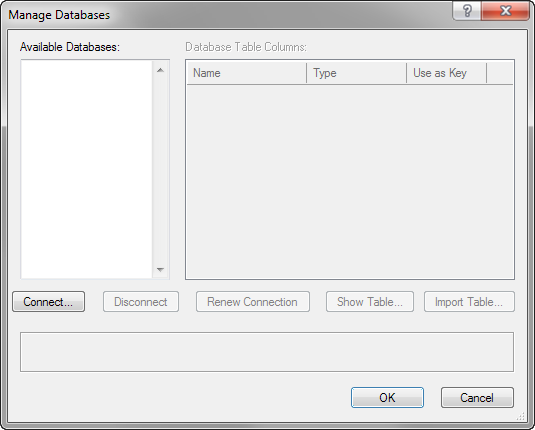
The Manage Databases dialog box opens. Through this dialog box, manage available databases and connect the desired database or databases to the current file.

Since the connection has not yet been made, the Available Databases list is empty. Click Connect.
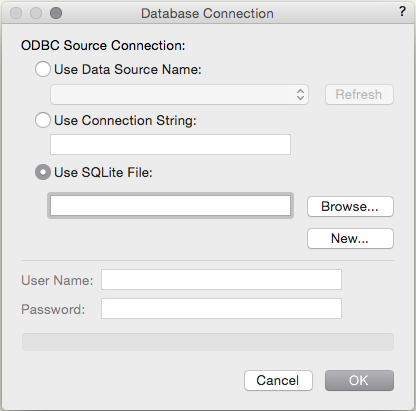
The Database Connection dialog box opens.

Click to show/hide the parameters.Click to show/hide the parameters.
|
Parameter |
Description |
|
Use Data Source Name |
Connect to a database source that was previously added to the ODBC manager or ODBC administrator; click Refresh to update the choices |
|
Use Connection String |
On Windows, this option allows temporary creation of data sources from files, or can select the known data source name similarly to the Use Data Source Name option. Click Build and select the database from the Machine Data Source tab. The connection string cannot be built from a specified source on the Mac. |
|
Use SQLite File |
Click Browse to select and connect to an SQLite database file; this type of database connection is indicated as [sqlite] in database-related dialog boxes. If no SQLite file exists, click New. Browse to an appropriate location and enter a file name to create an empty SQLite database file. Adding the appropriate file format extension is recommended (such as .db, .sqlite, .sqlite3). |
|
User Name/Password |
If a database connection requires a user name/password, enter the information |
Either select the SQLite file, or the named database added to the ODBC manager/administrator earlier; enter User Name and Password if required.
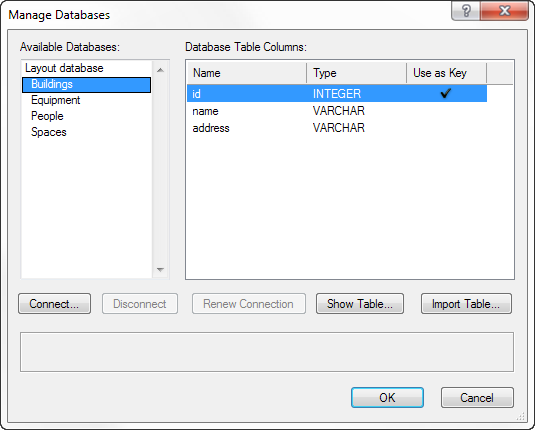
The selected database is added to the list of available databases in the Manage Databases dialog box. The tables associated with the database are listed on the left, with the database table columns listed on the right.

Select one of the available database tables; its rows display on the right. Select one of the rows to serve as the Key identifier by clicking in the Use as Key column for that row. The Key column uniquely identifies the data rows in the table. By default, this is one of the columns with unique data, used as a row identifier.
The ability to select the Key depends on the database driver. If needed, click Show Table to display the table’s contents and help select an appropriate Key.
Select the Key identifier for any other database tables. Each table must have at least one column selected as Use as Key.
Click Connect if there are other databases to connect, and identify the Key for each additional table.
Once the database tables have been selected and connected, and the Key identifier(s) set for each table, click OK.
The data sources have now been properly connected and identified for the file.
If the connection to the database becomes out of date, select the database and click Renew Connection to re-establish the database connection. Table and column information data is updated.
If there are problems connecting to the database, an error message provides troubleshooting information. Click Details to open a log file in the default text editor application. The log file provides further information to help diagnose connection errors.
