Translating and rotating a subdivision model
|
Mode |
Tool |
Tool set |
|
Transform
|
Edit Subdivision
|
3D Modeling |

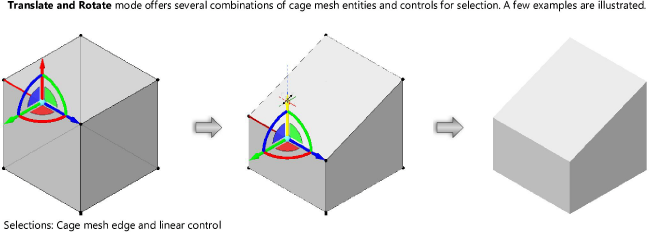
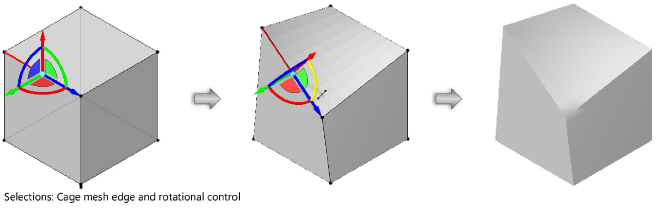
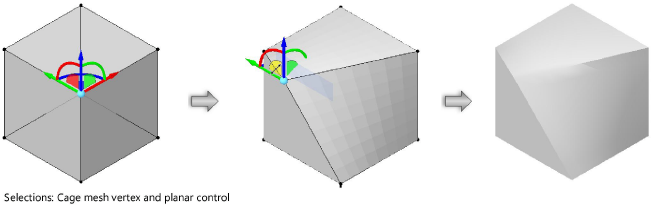
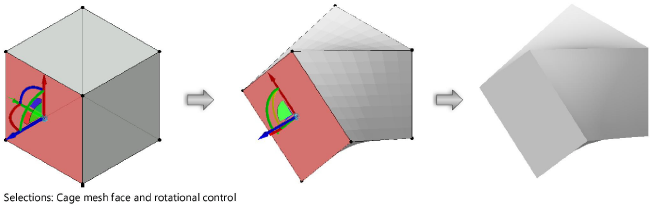
The Translate and Rotate mode is the Edit Subdivision tool’s most flexible mode. It is used for several free-form manipulations of the subdivision object.
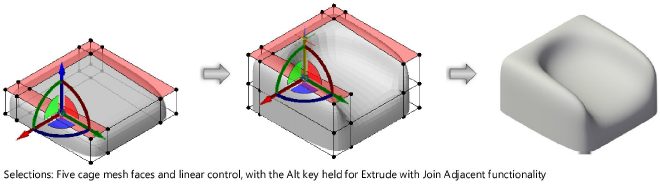
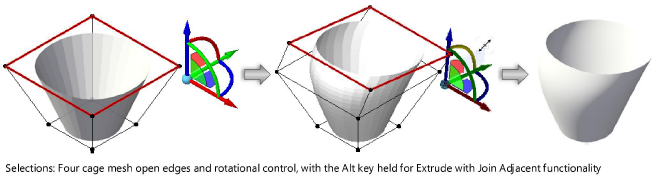
To extrude multiple cage mesh faces and/or open edges as though they were a single group, hold the Alt key while manipulating the 3D dragger to activate the Extrude with Join Adjacent functionality. (An open edge is an edge with only one adjacent face; this means that the cage mesh’s other adjacent faces have been completely deleted from the drawing using the Transform mode and the Delete key.)
To translate and rotate a subdivision model:
Select the subdivision object to edit.
Click the tool and mode.
Alternatively, double-click the subdivision object with the Selection tool to select the object and automatically activate the Edit Subdivision tool.
Click Translate and Rotate mode, and click either Align to Cage or Align to Working Plane mode, to ensure proper placement of the 3D dragger.
As you move the cursor over the cage mesh, its edges, faces, and vertices are highlighted to indicate they can be modified.
Click on a cage mesh entity to place the Translate and Rotate 3D dragger. To select multiple cage mesh entities, Shift-click, or Shift-drag to create a marquee selection.
The 3D dragger displays only when a cage mesh entity is selected.
Use Re-position mode if needed to move the 3D dragger to the desired location (see Repositioning the subdivision 3D dragger).
Click on the 3D dragger’s appropriate linear, planar, or rotational control and move the dragger to change the object’s shape. As you move the dragger, the new shape previews.
The selected control displays in yellow during the operation.
Click to complete the transformation.