 Creating railings
|
Tool |
Workspace: Tool set |
|
Railing
|
Architect and Landmark: Building Shell Spotlight: Event |

The Railing tool creates a railing either automatically along stairs or slabs, or manually along a specified path using standard polyline creation modes. The tool can create handrails, guardrails, or both.
Alternatively, create a 2D shape and then select the Create Objects from Shapes command (see Creating objects from shapes).
|
Mode |
Description |
|
Check mark (Pick mode)
|
Places the selected railing style in the locations selected in Pick mode. Alternatively, double-click to complete the operation. |
|
Pick
|
Defines the placement of the selected railing based on a set of selected stair flight, stair landing, or slab objects. Turn on object snapping. See Snapping to an object. |
|
Polyline
|
Draws the railing along a polyline path |
|
Gravity
|
Fits the railing to objects as you draw in Polyline mode; places the polyline on the ground plane, and creates the railing object correctly on the object |
|
Polyline creation options |
Selects the method for drawing the polyline upon which the railing is based; see Creating polylines |
|
Railing Style |
Opens the Resource Selector to select a resource |
|
Preferences
|
Opens the Railing Preferences dialog box to set default parameters |


To create a railing:
Click the tool and mode.
Do one of the following:
Click Railing Style on the Tool bar to select a resource from the Resource Selector.
Click Preferences to open the Railing Preferences dialog box and specify the tool’s default parameters.
The parameters can be edited later from the Object Info palette.
Do one of the following:
To draw the railing along a polyline path, click Polyline, and then click the polyline option to use.
To fit to objects beneath the railing while drawing in Polyline mode, enable Gravity mode.
To automatically create a railing along stairs or slabs, click Pick.
Do one of the following:
In Polyline mode, draw the object along a polyline path. Click to set the start point; each subsequent click ends the current segment and begins the next. If Gravity mode is enabled, draw the polyline along the object edge where railings are required. To complete the object, click the start point again (for a closed object), or double-click (for an open object).
Gravity mode is enabled while drawing a railing along the edges of a slab
Gravity mode, when enabled, places vertices "down." If the bottom of a post is under a site model, Gravity mode will not move it up.
In Pick mode, move the cursor to highlight individual edges of stairs, stair landings, or slabs. When over the desired edge, click to select the edge; continue selecting edges that require railings. Once the correct edges have been picked, click the check mark on the Tool bar (or double-click). Railing sections created from contiguous edges are automatically joined into a single object.
An exterior railing style is applied to the outside of the flight of stairs
Edit the railing settings from the Object Info palette. Edit the railing geometry as described in Editing railings. Join railing objects together with the Railing Join tool; see Joining railings.
Railing settings
To apply consistent settings to railings, it's recommended to use a railing style. The Vectorworks resource libraries provide several styles, or you can create a custom style.
To create a style, use the Railing tool’s Preferences to set the parameters, and then create a style as described in Custom plug-in object styles without catalog options.
These settings are available in the following locations:
Railing Preferences dialog box (creating an object)
Object Info palette (editing an object)
Railing Style dialog box (editing a style)
If a railing style is selected, only parameters set by instance can be edited (see Concept: Plug-in object styles). Parameters available only on the Object Info palette are listed at the bottom of the table.
Click to show/hide the parameters.Click to show/hide the parameters.
|
Parameter |
Description |
|
Use Style |
From the Resource Selector, double-click a resource to activate it, or click Unstyled. If a styled object is converted to unstyled, the current values are retained, but all parameters are set to By Instance to allow editing. |
|
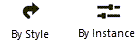
By Style/Instance |
A graphic indicates whether each parameter is set to By Style and given a fixed value or set to By Instance and editable in the dialog box. An object style may have a combination of both settings, to balance the need for consistency and flexibility. By Style/Instance settings are established by the style and cannot be changed from the settings dialog box.
To edit the object style, see Editing plug-in object styles; editing the style modifies all plug-in objects in the file that use the style. |
|
Preview |
The right pane of the dialog box displays a preview of the railing in the selected View and Render mode, along the distance specified in Length of Preview |
|
Object Info palette options only |
|
|
Style |
Replace, edit, or remove the current style, or (for unstyled objects only) create a new plug-in style (see Custom plug-in object styles without catalog options). Editing a style changes all instances in the file that use the style. |
|
Hide style parameters |
Hides the parameters that are set by style; these cannot be edited from the Object Info palette |
|
Settings |
Opens the Railing Settings dialog box |
|
Flip Offset |
If you entered a distance in Offset Railing from Path on the General pane or in the Object Info palette, switches the offset to the other side of the path |
Railing settings: General pane
Click to show/hide the parameters.Click to show/hide the parameters.
|
Parameter |
Description |
|
Draw Handrail/Guardrail |
Select whether to draw the guardrail or handrail only, or both |
|
Draw frame and infill |
For guardrails, draws the frame and infill sections between the posts; deselect the option for a simplified view during the design phase |
|
Draw 3D |
Displays the railing in 3D views. Hide the railing in 3D, or display it with full detail. A large set of railings drawn in 3D can impact performance. |
|
Offset Railing from Path |
Enter the distance to offset the railing object (handrail and guardrail) from the drawn path. To switch the offset to the other side of the path, click Flip Offset from the Object Info palette |
Railing settings: Handrail-Top Rail pane
Click to show/hide the parameters.Click to show/hide the parameters.
|
Parameter |
Description |
|
Handrail Offset |
Specifies the distance to offset the handrail from the railing object |
|
Handrail Height |
Enter the height of the handrail |
|
Top Rail Profile |
Opens the Resource Selector to select a top rail profile |
|
Top Rail Width/ Top Rail Depth |
Enter the dimensions of the top rail |
Railing settings: Handrail-Bracket pane
Click to show/hide the parameters.Click to show/hide the parameters.
|
Parameter |
Description |
|
Use bracket |
Adds brackets to support the handrail |
|
Bracket Shape |
Opens the Resource Selector to select a bracket profile |
|
Bracket Profile Width/ Bracket Profile Depth/ Bracket Height |
Enter the bracket profile dimensions and the height of the bracket from the centerline of the handrail top rail |
|
Spacing Type |
Select how to space the brackets. If there's a guardrail, the number and spacing of brackets is controlled by the guardrail post settings. |
|
Spacing Distance |
Enter the distance for Fixed Distance (the value represents the specific distance) or Equal Spacing (the value represents the maximum value) Spacing Type |
|
Number of Brackets |
When Fixed Number of Supports is selected in Spacing Type, enter the number of brackets to place |
|
Show bracket in 2D view |
Displays the brackets in Top/Plan view |
Railing settings: Handrail-Termination pane
Specify how the handrail terminates at both the start and end of the railing.
Click to show/hide the parameters.Click to show/hide the parameters.
|
Parameter |
Description |
|
Start Termination/ End Termination |
Select a horizontal or extended type of termination, or no termination |
|
Start Extension/ End Extension |
Enter the extension length |
|
Start Return Offset/ End Return Offset (Return extensions) |
Enter the offset distance from the start/end of the top rail |
|
Start Self-Return Height/ End Self-Return Height (Return to Self extensions) |
For self return terminations, enter the height of the self return |
Railing settings: Guardrail-Top Rail pane
Click to show/hide the parameters.Click to show/hide the parameters.
|
Parameter |
Description |
|
Guardrail Offset |
Specify the distance to offset the top of the guardrail from the railing object |
|
Guardrail Height |
Enter the height of the guardrail |
|
Use top rail |
Adds a top rail to the guardrail |
|
Top Rail Profile |
Opens the Resource Selector to select a top rail profile |
|
Top Rail Width/ Top Rail Depth |
Enter the dimensions of the top rail |
|
Use miter at start |
Uses a miter at the start of the top rail; set the Start Miter Angle |
|
Use miter at end |
Uses a miter at the end of the top rail; set the End Miter Angle |
|
Top Rail Boundaries |
Select whether the rail should extend along the the entire path or end at the first and last post |
Railing settings: Guardrail-Post pane
Click to show/hide the parameters.Click to show/hide the parameters.
|
Parameter |
Description |
|
Post Type |
Select the type of guardrail post |
|
Inset (Fascia Post) |
Enter the inset distance for the fascia |
|
Bottom Inset (Fascia Post) |
Enter the bottom inset distance for the fascia post |
|
Post Shape |
Opens the Resource Selector to select a post profile |
|
Post Width/ Post Depth |
Enter the post dimensions |
|
Use post at start |
Adds a post at the beginning of the guardrail; if desired, enter an offset distance from the end of the guardrail in Post Offset at Start |
|
Use post at end |
Adds a post at the end of the guardrail; if desired, enter an offset distance from the end of the guardrail in Post Offset at End |
|
Spacing Type |
Select the method of spacing the guardrail posts |
|
Spacing Distance |
Enter the distance for Fixed Distance (the value represents the specific distance) or Equal Spacing (the value represents the maximum value) Spacing Type |
|
Number of Posts |
When Fixed Number of Supports is selected in Spacing Type, enter the number of posts to place |
|
Show post in 2D view |
Displays the posts in Top/Plan view |
Railing settings: Guardrail-Frame pane
Click to show/hide the parameters.Click to show/hide the parameters.
|
Parameter |
Description |
|
Offset Frame |
Specify the distance to offset the frame from the railing object |
|
Frame Boundaries |
Select whether the frame ends at the railing end or the post end; this is useful when the post is offset from the start or end |
|
Distance to Top Rail |
Enter the distance between the top of the frame and the top rail |
|
Distance to Floor/Nosing |
Enter the distance between the bottom of the frame and the floor or nosing |
|
Distance to Posts |
Enter the distance from the sides of the frame to each post |
|
Bars at top edge/ Bars at bottom edge/ Bars at left/right edge |
Select whether to include bars along the edges of the frame |
|
Bar Profile |
Select a shape for the bars |
|
Bar Thickness/Depth |
Enter the bar dimensions for profiles other than Line |
Railing settings: Guardrail-Infill pane
Select bars or a panel type of infill; the selection determines which parameters are available.
Click to show/hide the parameters.Click to show/hide the parameters.
|
Parameter |
Description |
|
Infill Type |
Select an infill made of bars (vertical and/or horizontal bars) or a panel type of infill |
|
Offset Infill |
Specify the distance to offset the infill bars or the infill panel relative to the frame; because the distance is relative to the frame, if the frame offset changes, the infill moves along with it. Setting an offset for the infill is useful for aligning the infill to be flush with the frame on the left or right side. |
|
Bars parameters |
|
|
Evenly spaced with top and bottom edges |
Spaces the bars at an even distance to the top and bottom edges; deselect this option to specify varying distances |
|
Distance to Top Edge/Distance to Bottom Edge |
When the bars are not evenly spaced with the top and bottom edges, specifies the individual distances to each edge |
|
Evenly spaced with left and right edges |
Spaces the bars evenly within the frame; deselect this option to specify a different distance from the left and right edges of the frame |
|
Distance to Left/Right Edge |
When the bars are not evenly spaced within the frame, specifies the distance from the left and right edge |
|
Use vertical bars |
Adds vertical bars to the frame; enter the distance between the bars in Vertical Bar Spacing |
|
Use horizontal bars |
Adds horizontal bars to the frame; enter the distance between the bars in Horizontal Bar Spacing |
|
Rotate bars to diagonal |
For straight railing sections, rotates the bars |
|
Bar Profile |
Select a shape for the bars |
|
Bar Thickness/ Bar Depth |
Enter the bar dimensions for profiles other than Line |
|
Panel parameters |
|
|
Distance to Top Edge/Distance to Bottom Edge |
Specifies the distance of the panel to the top and the bottom edge of the frame |
|
Distance to Left/Right Edge |
Specifies the distance of the panel to the left/right edge of the frame |
|
Panel Thickness |
Enter the panel thickness |
Railing settings: Corners pane
Click to show/hide the parameters.Click to show/hide the parameters.
|
Parameter |
Description |
|
Support at corners |
Adds supports for infill frames or panels at railing corners |
|
Use double supports |
Adds supports for each side of the corner; enter the distance for each support from the corner in Distance from Corners |
|
Corner Angle Alignment |
Specify how to align the corner post with the railing. Align to Previous Edge: Aligns to the railing segment that comes before the corner Align to Following Edge: Aligns to the railing segment that comes after the corner Align to Corner Bisector: Aligns to an angle that divides the two segments |
|
Use infill at corners |
Extends the infill to the corners of the railing |
Railing settings: Attributes pane
Click to show/hide the parameters.Click to show/hide the parameters.
|
Parameter |
Description |
|
Attributes |
Lists all geometry that has graphic attributes settings. The class and graphic attributes of each part of the object are displayed. Double-click a line in the list browser, to set attributes for the part, and do any of the following: To control appearance and visibility, select a class from the list of classes present in the drawing, or create a new class. Select <Fence Class> to place the part in the same class as the fence object. To specify a material for a 3D part, select one from the Resource Selector; the material provides the fill and texture, though the texture can be overridden. Set the attributes; see The Attributes palette. To specify a texture for a 3D part, select a texture from the Resource Selector, or click one of the buttons to use no texture, to use the class texture, or if the material's texture was previously overridden, to revert to the material's texture. Set the map type and rotation as needed; see Concept: Texture projection and orientation. For textures on a 3D part, select Randomize offsets to apply a random horizontal/vertical offset to each instance of a subpart, resulting in a natural, random texture appearance. For textures on a 3D part, select Follow longest edge to orient the texture along the longest edge of the part. This can prevent the texture on a post or rail from being flipped in a wrong direction that doesn't match the post orientation. |
|
Make All Attributes By Class |
Sets all material, fill, pen, line style, line thickness, and texture attributes by class |
|
Remove All By Class Settings |
Removes all class settings for material, fill, pen, line style, line thickness, and texture attributes |
