Repositioning the 3D dragger
The 3D dragger can be moved from its default position relative to the selected object, to allow greater control and flexibility in free-form reshaping. Because free-form movements are performed relative to the 3D dragger's center, some operations can only be completed if the 3D dragger is repositioned away from a selected entity.
To reposition the 3D dragger:
Begin to use the tool's Translate and Rotate mode or Scale mode and the appropriate alignment mode, as described in Translating and rotating objects with the 3D dragger or Scaling objects with the 3D dragger.
With the 3D dragger present in the drawing area, click Re-position mode; the 3D dragger is grayed to indicate the mode.
You can temporarily invoke Re-position mode by pressing the Alt key (Windows) or Command key (Mac) while moving the 3D dragger.
Click the appropriate linear, planar, or rotational control, or the center screen plane control, to reposition the 3D dragger as needed.
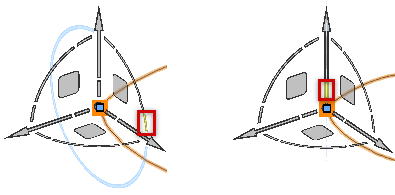
The active control displays in yellow during the operation. Depending on the selected control, a projection line, plane indicator, or rotation circle displays to indicate the available movement. As you move the dragger, the change previews. The 3D dragger moves differently depending on the alignment mode and dragger control selected.
By default, snapping is temporarily disabled while using a linear or rotational control to reposition the 3D dragger. To enable snapping, click the segmented end of the desired control rather than the control itself.
Move the cursor to reposition the 3D dragger, and then click to place it. The 3D dragger does not have to be located on the object being reshaped; the entity on which the 3D dragger was initially placed remains selected.
Click Translate and Rotate mode or Scale mode to initiate the next edit.
