Creating render styles
You can create a variety of custom render styles, in addition to the selection of basic styles that come with Vectorworks. Render styles can interpret textures, lighting, camera effects, and quality as needed for each specific rendering. A custom render style can have settings locked by style (these will be the same for every rendering that uses the style). Other parameters can be adjusted by instance for each rendering using the style. Some parameters, such as the camera's focus distance and the DMX settings for Showcase render styles, must always be set by instance. See Editing applied render styles to access and edit by instance parameters in viewports or design layers.
See Render styles for a general discussion of the rendering types and how to determine which type is most appropriate for particular models. Render styles are saved as resources. For more information on creating resources, see Creating resources.
If you create a render style while the layer or viewport is rendered in any Renderworks mode or a render style, the current settings are used as the basis for the new style. This is a convenient way of saving render settings.
To create a render style resource:
From the Resource Manager, click New Resource, select Render Style, and then click Create. Alternatively, from the Resource Manager, select Render Styles from the list of resource types on the tool bar, and click New Render Style.
The Create Render Style dialog box opens.
Name the style resource, and select the style's type; for a photorealistic render style, see Choosing a photorealistic render type to help determine which option best meets your needs.
Different options to define the style are available depending on Type selected. See the appropriate section below for the parameters.
Select whether each parameter is by style or by instance, and set the default settings.
The render style displays in the Resource Manager and is saved with the file. It is added to the list of available render styles in View > Render Style, and in the Current Render Mode menu on the View bar.
To edit a render style resource after it has been created, from the Resource Manager, right-click on the resource, and select Edit from the context menu. See Resource Manager: Resource viewer pane. Editing the render style changes all viewports and design layers that use the style.
Artistic render style
An Artistic type creates a render style based on Artistic Renderworks options. The preferences are grouped into tabs of related parameters. Select each tab and specify the parameters.
Click to show/hide the parameters.Click to show/hide the parameters.
|
Parameter |
Description |
|
Artistic Style |
Select an Artistic render style and set any options; see Artistic Renderworks options |
|
Background |
|
|
Renderworks background |
Select a Renderworks background to apply to the layer or viewport when the render style is used. Select None to leave the current background unchanged when the render style is applied. |
|
Edit Resource |
If a Renderworks background is selected, click to open the Edit Renderworks Background dialog box and set the options; see Creating Renderworks backgrounds |
Realistic render style
A Realistic type creates a render style based on Custom Renderworks options. The preferences are grouped into tabs of related parameters. Select each tab and specify the parameters.
Click to show/hide the parameters.Click to show/hide the parameters.
|
Parameter |
Description |
|
All by Style |
Toggles all parameters in the dialog box to by style or by instance; these settings can be changed individually as needed |
|
By Style/Instance |
For each parameter, toggle to the desired setting. Parameters set by instance use the provided settings as the defaults when the style is applied, but they can be edited for each individual rendering.
|
|
Options |
|
|
Anti-aliasing |
Select for smoother edges on objects and textures; deselect for faster rendering with rougher edges |
|
Shadows |
Renders shadows for a higher degree of realism |
|
Textures |
Renders the textures assigned to objects; deselect for faster rendering |
|
Blurriness |
Renders textures with blurred reflectivity and/or blurred transparency (this can add significant rendering time) |
|
Displacement mapping |
Renders with displacement mapping when a texture’s bump shader setting has a displacement height set; select the displacement mapping quality on the Quality tab. Deselect for faster rendering. |
|
Caustics |
Renders caustics from light objects that have Caustic Photons set to a value other than None from the Object Info palette (see Light source properties) |
|
Grass |
When a grass color shader is used for a texture, renders the blades of grass. When this option is deselected, the first shader color (or image) is used, but blades of grass are not rendered, saving rendering time for large surfaces or dense grass. |
|
Colors |
When selected, renders colors, and textures with colors; deselect to render colors as white |
|
Fullscreen preview |
Immediately provides a full-screen preview at a very low resolution that is slow to resolve to final resolution; this is useful when working interactively to test rendering settings on a design layer. To save time, deselect this option when you are not making adjustments. Rendering occurs with final-rendered squares that populate the drawing. |
|
Quality |
For each parameter, select the quality level. Higher quality results in better resolution of rendered images, with better texture detail and softer shadows, but takes more time. |
|
Quality Levels |
Conveniently sets the quality level of all the options at one time. Custom indicates that some options have different quality levels set. |
|
Curved Geometry |
Select the quality level for faceting of curved geometry (such as NURBS surfaces) |
|
Anti-Aliasing |
Select the quality level for anti-aliasing (smoothing) of edges on objects and textures |
|
Indirect Lighting |
Select the quality level for indirect lighting effects |
|
Soft Shadows |
Sets the quality level of shadows for light objects that have Soft Shadows enabled. For area and line lights, specifies the sampling quality of the light. |
|
Blurriness |
Select the quality level of textures with blurry reflectivity and/or transparency |
|
Environment Lighting |
Select the sampling quality level for environment background lighting. This option has no effect when indirect lighting is enabled for the lighting options. |
|
Displacement Mapping |
When enabled on the Options tab and set for a bump shader, select the quality of the displacement mapping. Higher quality is more realistic for fine displacement bumps, but will require longer rendering times. Rendering can be significantly slower with displacement mapping. |
|
Max Reflections |
Enter the number of levels of reflection among shiny surfaces; a higher value slows rendering, but can yield a more realistic image for scenes with many inter-reflecting objects |
|
Lighting |
Sets the lighting options; see Setting lighting options. |
|
Camera |
When Apply camera effects is selected, sets the camera options for the style; see the Renderworks Camera Effects parameters in Placing a Renderworks camera. If a Renderworks camera sets the active view, the camera's effects override the render style settings. |
|
Edges |
|
|
Apply artistic edges |
Applies artistic edges on top of the realistic rendering |
|
Style |
Select an edge style |
|
Thickness (pixels) |
Specifies the edge thickness |
|
Color |
Specifies the edge color |
|
Background |
|
|
Renderworks background |
Select a Renderworks background to apply to the layer or viewport when the render style is used. Select None to leave the current background unchanged when the render style is applied. |
|
Edit Resource |
If a Renderworks background is selected, click to open the Edit Renderworks Background dialog box and set the options; see Creating Renderworks backgrounds |
|
Environment Reflections |
Sets the background that reflects from glass and metal surfaces independently of the Renderworks Background that surrounds the drawn object; the resource should have either a Physical Sky or Panoramic Image background type. See Creating Renderworks backgrounds. |
|
Edit Resource |
If a different Renderworks background is selected, click to open the Edit Renderworks Background dialog box and set the options; see Creating Renderworks backgrounds |
Realistic RS render style
A Realistic RS type creates a render style based on Maxon's Realistic RS rendering technology, which can trace rays for reflections, lighting, volumetric effects, camera effects, and anti-aliasing. Images that do not use these effects may not benefit from using Realistic RS. If enabled, rendering in design layers can interactively preview as you adjust views, textures, lighting, and geometry. If the computer hardware supports it, Realistic RS is processed on the GPU, so rendering time can be much shorter for complex files with many of these effects.
See www.vectorworks.net/sysreq for system requirements for processing Realistic RS on either the CPU or GPU. Computers that do not support Realistic RS will default to a Realistic type instead; when Realistic RS is the selected Type, a sentence above the tabs indicates whether the machine supports Realistic RS. Processing Realistic RS style renderings on the Vectorworks Cloud is available only with a subscription or as a benefit of Vectorworks Service Select.
The preferences are grouped into tabs of related parameters. Select each tab and specify the parameters.
Click to show/hide the parameters.Click to show/hide the parameters.
|
Parameter |
Description |
|
All by Style |
Toggles all parameters in the dialog box to by style or by instance; these settings can be changed individually as needed |
|
By Style/Instance |
For each parameter, toggle to the desired setting. Parameters set by instance use the provided settings as the defaults when the style is applied, but they can be edited for each individual rendering.
|
|
Options |
|
|
Update Mode |
Select Bucket or Progressive update mode: Bucket: updates the image with square tiles or "buckets" in an inside-out pattern. With this mode, rendering time is extended but rendering quality is improved. Progressive: immediately provides a full-screen preview at a very low resolution that is slow to resolve to final resolution; this is useful when working interactively to test rendering settings on a design layer. Final rendering quality depends on the number of progressive passes. |
|
Progressive Passes |
Select the number of passes to display. More passes result in a higher final quality, but take longer to complete. |
|
Enable interactive preview rendering (IPR) in design layers |
Enables Progressive Update Mode to work interactively within a design layer as you edit the drawing in a 3D view. IPR's initial preparation can take several seconds before generating the first rendering, depending on the complexity of the model and the computer's hardware capabilities. The interactive progressive rendering becomes faster after the initial rendering. Actions such as changing the view (panning, zooming, flyover) and changing existing lights, update the preview very quickly. Some actions, such as adding or deleting an object, applying a new background, or changing textures, slow the preview's reaction time. Other actions, such as changing render modes, changing geometry quality settings, and turning camera effects on and off, require IPR to repeat the initial preparation step before re-rendering. IPR settings, including the starting and ending resolutions, only affect design layer rendering; they have no effect on the rendering of a sheet layer, viewport, exported image, print, and so on. |
|
Starting Resolution |
Set the initial rendering resolution for interactive preview rendering (IPR); a lesser resolution creates a faster initial preview, at a lower quality, that improves as the progressive passes are completed |
|
Ending Resolution |
Set the final rendering resolution for interactive preview rendering (IPR) on the design layer; a lesser resolution completes the rendering faster, but at a lower final quality |
|
Enable denoising |
Uses artificial intelligence to replace speckled rendering artifacts with smooth continuous shading. For some scenes, setting Sampling lower on the Quality tab and using denoising can result in a similar final quality rendering with shorter processing time than a higher quality without denoising. Disable denoising for faster rendering of large models on slower computers, especially when using interactive preview rendering in design layers.
The image on the left uses Very High Sampling with Enable denoising turned off; its render time was 6:01. The image on the right uses Low Sampling with Enable denoising turned on; its render time was 1:31. |
|
Render shadows |
Renders shadows for a higher degree of realism |
|
Show textures |
Renders the textures assigned to objects; deselect for faster rendering |
|
Show colors |
When selected, renders colors, and textures with colors; deselect to render colors as white |
|
Quality |
|
|
Curved Geometry |
Select the quality level for faceting of curved geometry (such as NURBS surfaces) |
|
Sampling |
Select the sampling quality to affect anti-aliasing, blurred transparency and reflections, soft shadows, and indirect lighting quality; High creates a smoother, higher quality rendering, and Low results in faster rendering |
|
Lighting |
Sets the lighting options; see Setting lighting options. Realistic RS render styles use only some of the generally available lighting options, and you must choose between environment lighting from a panoramic image background or ambient lighting. |
|
Camera |
When Apply camera effects is selected, sets the camera options for the style; see the Renderworks Camera Effects parameters in Placing a Renderworks camera. If a Renderworks camera sets the active view, the camera's effects override the render style settings. Camera effects are disabled when Enable interactive preview rendering (IPR) in design layers is selected. |
|
Background |
|
|
Renderworks background |
Select a Renderworks background to apply to the layer or viewport when the render style is used. Select None to leave the current background unchanged when the render style is applied. |
|
Edit Resource |
If a Renderworks background is selected, click to open the Edit Renderworks Background dialog box and set the options; see Creating Renderworks backgrounds. Separate control of reflection backgrounds isn't possible with the Realistic RS render type. |
Shaded render style
A Shaded type creates a render style based on Shaded options. The preferences are grouped into tabs of related parameters. Select each tab and specify the parameters.
Click to show/hide the parameters.Click to show/hide the parameters.
|
Parameter |
Description |
|
All by Style |
Toggles all parameters in the dialog box to by style or by instance; these settings can be changed individually as needed |
|
By Style/Instance |
For each parameter, toggle to the desired setting. Parameters set by instance use the provided settings as the defaults when the style is applied, but they can be edited for each individual rendering.
|
|
General |
|
|
Textures |
Renders object textures; this provides better detail and is usually enabled, but it takes longer to render. Some shaders are intended to be used with the Renderworks render modes. In Shaded mode, you will see an approximation of the shader appearance, which may be different from the appearance in Renderworks render modes. |
|
Colors |
When selected, renders colors, and textures with colors; deselect to render colors as white |
|
Anti-aliasing |
Filters the rendering and reduces pixelated edges; this option is only available if the graphics card supports the feature |
|
Shadows |
Objects in the drawing cast shadows on other objects |
|
On ground only |
Drawing objects cast shadows on a plane at the lowest point in the drawing—which is usually the active layer plane—but not on other objects |
|
Draw edges |
Renders objects with lines drawn around the edges, similar to the lines in the Hidden Line Render mode. Edges are drawn where objects meet; break up an object into multiple objects if more edges are needed. |
|
Edge Thickness (Pixels) |
Enter a value between 1–16 pixels for the edge thickness |
|
Crease angle |
If Draw edges is selected, enables crease edges at divergent surfaces; set the Threshold angle at which to start showing crease edges |
|
Environment lighting |
Uses the active Renderworks background (if any) as an ambient light source for the rendering (see Concept: Renderworks backgrounds). Environment lighting's brightness can be controlled in the Ambient Info section of the Lighting tab. |
|
Environment reflections |
Uses the active panoramic image or physical sky type Renderworks background (if used) as a source for reflections off surfaces (see Concept: Renderworks backgrounds). If the active background is not a panoramic image or physical sky, the default Renderworks gray environment background is used. |
|
Object reflections |
Allows objects to reflect other nearby objects |
|
Quality |
|
|
Details |
Specifies the quality level for faceting of curved geometry; a low setting renders faster |
|
Shadows |
Select the level of quality for the shadow edges (a low setting uses less memory and renders faster) |
|
Lighting |
Sets the lighting options; see Setting lighting options |
|
Camera |
Sets the camera options; see the Renderworks Camera Effects parameters in Placing a Renderworks camera. If a Renderworks camera sets the active view, the camera effects override the render style settings. |
|
Background |
|
|
Renderworks Background |
Select a Renderworks background to apply to the layer or viewport when the render style is used. Select None to leave the current background unchanged when the render style is applied. |
|
Edit Resource |
If a Renderworks background is selected, click to open the Edit Renderworks Background dialog box and set the options; see Creating Renderworks backgrounds |
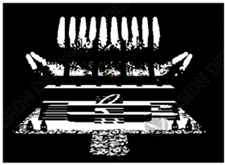
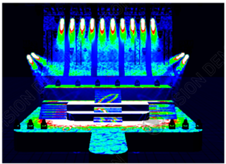
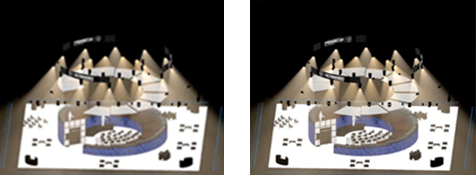
 Showcase render style
Showcase render style is based on Shaded render style, but provides additional parameters designed to work with the Showcase feature. Showcase render style also uses different tone mapping from other render styles/modes to handle the specific lighting/brightness needs of the Showcase feature. The preferences are grouped into tabs of related parameters. Select each tab and specify the parameters.
When editing a Showcase render style or an unstyled rendering instance from the Showcase palette or Showcase Preferences, the parameters are the same (though the names may vary slightly), but they are organized onto only two tabs to streamline editing. Parameters shown on the General and Quality tabs below are combined onto the General tab, and parameters shown on the Lighting, Camera, and Background tabs below are combined onto the Environment and Settings tab.
Click to show/hide the parameters.Click to show/hide the parameters.
|
Parameter |
Description |
|
All by Style |
Toggles all parameters in the dialog box to by style or by instance; these settings can be changed individually as needed |
|
By Style/Instance |
For each parameter, toggle to the desired setting. Parameters set by instance use the provided settings as the defaults when the style is applied, but they can be edited for each individual rendering.
|
|
Recording |
This tab, which controls the DMX recording used for a Showcase playback, is available only when the you edit a render style applied to a viewport by clicking Background Render Settings from the Object Info palette. These parameters are always set by instance. |
|
Recording |
Select the recording to play in Showcase when this render mode is in use. The DMX file needs to correspond with the lighting devices in the current file for the correct playback to occur. If a recording doesn't already exist in the file, you are prompted to create a DMX snapshot when you create a viewport that uses the render style for the background render mode. |
|
Time |
Scrubs the timeline to the desired location in the video |
|
General |
|
|
Hide lighting device geometry |
Since previz normally occurs in a dark interior environment, displaying each moving lighting device's geometry is not typically necessary. Hiding the moving lighting device geometry is recommended for faster rendering. |
|
Enable false color rendering |
Enables false color rendering, to visualize radiance intensity across surfaces and within the venue and resolve under- and over-lighting issues. Click False Color Rendering Options to set the parameters. |
|
False Color Rendering Options |
Opens the False Color Rendering Options dialog box, to set the color mode and the minimum and maximum lux thresholds. The scene updates live as you change the values in this dialog box. In Black and White Mode, set the Minimum Threshold (Lux). Areas in the scene below this threshold are rendered black; all other areas are rendered white.
In Color Gradient Mode, set both the Minimum Threshold (Lux) and Maximum Threshold (Lux) values for radiance intensity. Areas below the minimum threshold are rendered black, and areas above the maximum threshold are rendered white. Areas between the thresholds display a gradient, from blue on the low end to red on the high end.
|
|
Textures |
Renders object textures; this provides better detail and is usually enabled, but it takes longer to render. Some shaders are intended to be used with the Renderworks render modes. In Shaded mode, you will see an approximation of the shader appearance, which may be different from the appearance in Renderworks render modes. |
|
Colors |
When selected, renders colors, and textures with colors; deselect to render colors as white |
|
Anti-aliasing |
Filters the rendering and reduces pixelated edges; this option is only available if the graphics card supports the feature |
|
Shadows |
Normally, shadows are off for previz; however, select the option to enable objects in the drawing to cast shadows on other objects, if needed |
|
On ground only |
Drawing objects cast shadows on a plane at the lowest point in the drawing—which is usually the active layer plane—but not on other objects |
|
Draw edges |
Renders objects with lines drawn around the edges, similar to the lines in the Hidden Line Render mode. Edges are drawn where objects meet; break up an object into multiple objects if more edges are needed. |
|
Edge Thickness (Pixels) |
Enter a value between 1–16 pixels for the edge thickness |
|
Crease angle |
If Draw edges is selected, enables crease edges at divergent surfaces; set the Threshold angle at which to start showing crease edges |
|
Environment lighting |
Uses the active Renderworks background (if any) as an ambient light source for the rendering (see Concept: Renderworks backgrounds). Environment lighting's brightness can be controlled in the Ambient Info section of the Lighting tab. |
|
Environment reflections |
Uses the active panoramic image or physical sky type Renderworks background (if used) as a source for reflections off surfaces (see Concept: Renderworks backgrounds). If the active background is not a panoramic image or physical sky, the default Renderworks gray environment background is used. |
|
Object reflections |
Allows objects to reflect other nearby objects |
|
Quality |
|
|
Details |
Specifies the quality level for faceting of curved geometry; a low setting renders faster |
|
Shadows |
Select the level of quality for the shadow edges (a low setting uses less memory and renders faster) |
|
Lighting |
Sets the lighting options; see Setting lighting options |
|
Camera |
Sets the camera options; see the Renderworks Camera Effects parameters in Placing a Renderworks camera. If a Renderworks camera sets the active view, the camera effects override the render style settings. |
|
Background |
|
|
Renderworks background |
Select a Renderworks background to use for the Showcase rendering (in particular, for lit fog effects). Select None to leave the current background unchanged when the render style is applied. |
|
Edit Resource |
If a Renderworks background is selected, click to open the Edit Renderworks Background dialog box and set the options; see Creating Renderworks backgrounds |
|
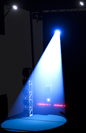
Lit fog |
Enables creation of volumetric lighting effects, such as a shaft of light in fog, haze, or smoke.
|
|
Lit Fog Density (%) |
To control the the fog density, drag the slider to the right to increase the density, or enter a density percentage |
|
Animated Lit Fog |
Enables the animated fog effects. Animated lit fog is visible only within the lights' spotlight cone. The fog effects preview live as you change the values in this dialog box. Pocket Density (%) controls the lit fog density in pockets between the maximum density regions; enter a value between 0 (for the pockets to have no fog) and 100 (which creates a completely smooth fog pattern). Turbulence (%) defines how quickly the fog pattern will change over time; turbulence is independent of the fog direction. Scale (%) controls how large the clouds and pockets of fog are; larger values result in larger clouds and pockets. Velocity (%) controls how fast the fog moves on the X, Y, and Z axis directions over time. A value of 0% for an axis results in no movement on that axis; a value of 100% on an axis results in a maximum amount of movement along that axis. Positive values move the fog left to right, and negative values move the fog right to left. |