Showing depth in a viewport
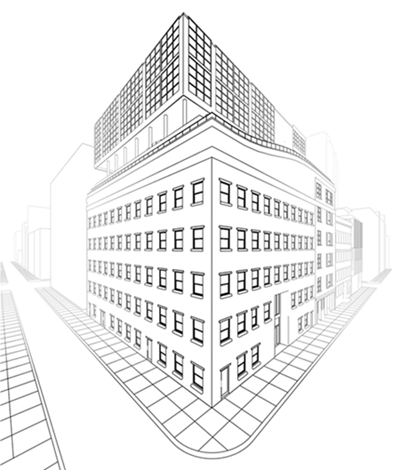
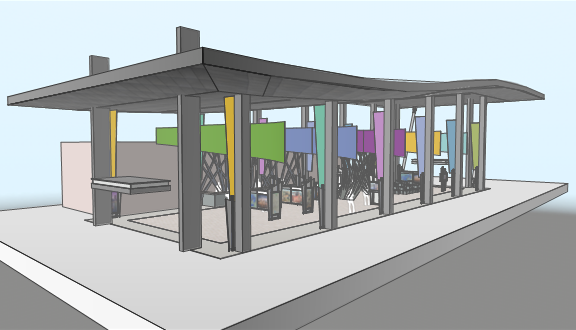
Sheet layer viewports and section viewports, including interior elevation viewports, rendered in Shaded or Hidden Line render modes offer depth cueing options that make perspective and orthogonal views more realistically display objects nearer to or farther from the viewpoint. To add depth to a shaded viewport, apply and define a gradient that desaturates the color of the object fills as the distance increases. To add depth to a hidden line viewport, set the lines' tonal values and/or thickness to recede with distance.
For styled viewports, depth cueing, like other render settings, is available only if the render mode is set by instance.

Because depth cueing is as much art as science, interactive controls on the Shaded Options and Hidden Line Render Settings dialog boxes allow you to use two spot markers to adjust gradients and lines at different points along the entire grade of the rendering. Shaded depth cueing changes are previewed as you make them, for real-time adjustment. Hidden line changes don't preview, but they display as soon as the dialog box closes, with no need to update the viewport.
Depth cueing applies to the entire grade of a viewport, from the closest object in view (or the section plane for a section viewport) to the most distant object in view (or where the farthest extents are for a section viewport). For non-section viewports, it may be useful to display the viewport with a clip cube to limit the extent the of depth cueing.
To apply depth cueing to a sheet layer viewport or section viewport:
Do one of the following:
To apply depth cueing when creating a viewport or a viewport style that uses either Shaded or Hidden Line render mode, click Background Render Settings in the dialog box, or if the rendering uses Hidden Line for Foreground Render, click Foreground Render Settings.
To apply depth cueing to a selected viewport that uses either Shaded or Hidden Line render mode, click Background Render Settings on the Object Info palette, or if the rendering uses Hidden Line for Foreground Render, click Foreground Render Settings.
If a viewport uses a shaded background render and a hidden line foreground render, each can be adjusted separately to layer the depth cueing effects.
The Shaded Options dialog box or Hidden Line Render Settings dialog box opens, with a Depth Cueing tab that is only available when the dialog is opened in this context.
On the Depth Cueing tab, enable the desired cueing, and then make the needed adjustments to each spot marker to change the gradient or line fading/thickness as they grow more distant.
You may need some experimentation and repeated adjustments to each viewport to make it look exactly as you want.
Shaded options
Click to show/hide the parameters.Click to show/hide the parameters.
|
Parameter |
Description |
|
General/Camera/Quality tab |
Tabs and parameters unrelated to depth cueing; see Shaded options |
|
Depth Cueing |
Available when the dialog box is opened from the Object Info palette of a sheet layer viewport or section viewport |
|
Enable depth cueing |
Toggles depth cueing on and off in the viewport |
|
Position |
Indicates the location (0.0–1.0) of the selected spot marker along the entire grade of the rendering |
|
Gradient preview |
Displays the gradient in a preview bar. The bar represents the entire grade of the rendering, from the closest to farthest visible objects. |
|
Spot marker
|
Specifies the starting and ending positions for the gradient along the grade; the left marker represents the nearest objects in the viewport, and the right marker represents the back of the model or extents of the viewport. Drag a spot marker to a new location in the gradient preview area, and specify its opacity, below. Portions of the rendering to the left of the left spot and to the right of the right spot maintain the same opacity as the spot. |
|
Opacity |
For the selected spot marker, drag the slider to the left to decrease the opacity, or enter an opacity percentage (0–100) to the right of the slider. Gradients do not become translucent and show the objects behind them as the opacity is reduced; the color is simply faded. |

Hidden line options
When you first apply depth cueing to a hidden line viewport, you must update the viewport to see the effects. Subsequent depth cueing changes are applied automatically.
Click to show/hide the parameters.Click to show/hide the parameters.
|
Parameter |
Description |
|
General tab |
Tab and parameters unrelated to depth cueing; see Line render options |
|
Depth Cueing |
Available when the dialog box is opened from the Object Info palette of a sheet layer viewport or section viewport |
|
Position
|
Indicates the location (0.0–1.0) of the selected spot marker along the entire grade of the rendering |
|
Line thickness preview (First preview bar) |
Displays the line thickness in a preview bar. The bar represents the entire grade of the rendering, from the closest to farthest visible objects. |
|
Line fading preview (Second preview bar) |
Displays the line's tonal value in a preview bar. The bar represents the entire grade of the rendering, from the closest to farthest visible objects. |
|
Spot marker
|
Specifies the starting and ending positions for the line fading/thickness settings along the grade; the left marker represents the nearest objects in the viewport, and the right marker represents the back of the model or extents of the viewport. Drag a spot marker to a new location in the preview area, and specify its fading and/or thickness, below. Portions of the rendering to the left of the left spot and to the right of the right spot maintain the same value setting as the spot. Although the spot markers are located on the line fading preview, the position setting is the same for line thickness and surface weight hatch. |
|
Line Weight |
Controls both the fade and thickness of the render lines |
|
Line fading |
Controls how the lines' tonal value changes as lines become more distant. Changes in tone begin at the original attribute or class value set for the line, so that if a line is already set at below 100% saturation, line fading begins at that value rather than 100. For the selected spot marker, drag the Tone slider to the left to make the tone lighter, or enter a percentage (0–100) to the right of the slider. Select Smoothing (slower) to break the line into smaller segments that smoothly fade the ine; this option will make drawing the viewport slower in large files. |
|
Line thickness |
Controls how the line thickness changes as lines become more distant. These settings adjust all class attributes, line thickness overrides and scaling applied through the viewport settings. For the selected spot marker either select Scaled Thickness and drag the slider to a value between 0% and 200% or enter a precentage, or select Fixed Thickness and set the line thickness to a fixed value at the selected spot. To specify a line weight not already available for a fixed thickness, click Set Thickness from the list and enter the value and units. Scaled Thickness is better for showing how objects recede into the distance, as in a perspective view. Fixed Thickness is better to emphasize the relative distance of different objects in a section view. Select Tapering (slower) to break the line into smaller segments that smoothly taper the thickness; this option will make drawing the viewport slower in large files. |
|
Surface Hatch Weight |
|
|
Scale line weight of surface hatches |
Applies a separate scale for surface hatches, in addition to any line weight settings. This allows surface hatches to appear lighter and/or thinner than outlines.
For the selected spot marker, drag the Scaled Weight slider to the left to decrease the scale relative to the outlines, or enter a scale percentage (0–100) to the right of the slider |
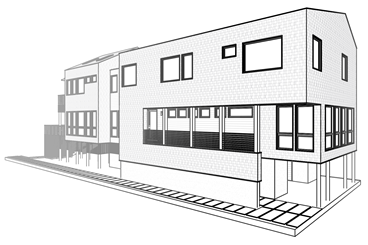
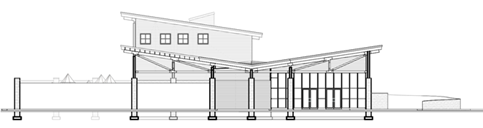
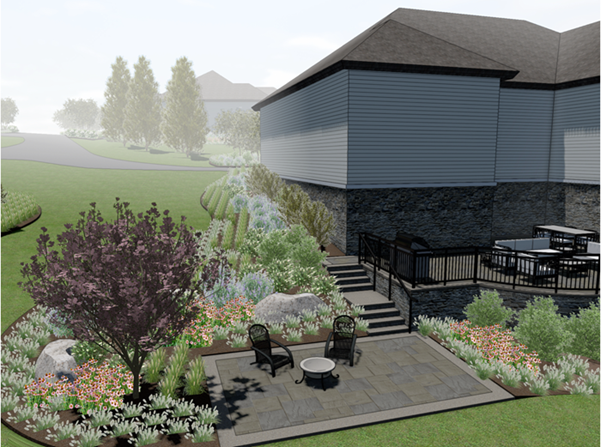
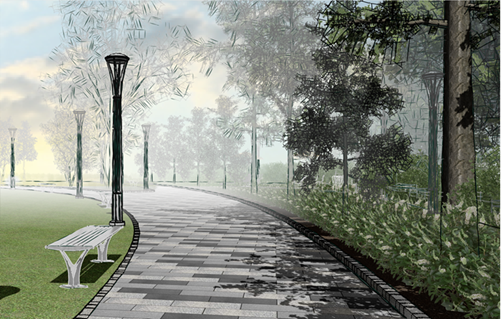
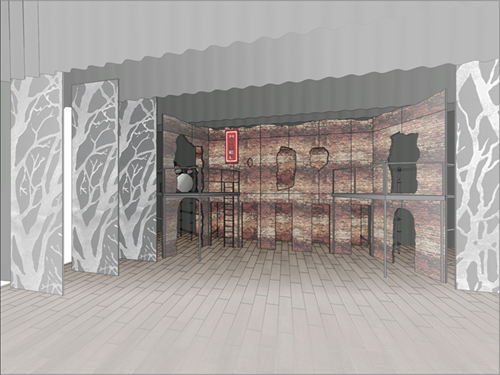
When a viewport has a Shaded Background Render and a Hidden Line Foreground Render, depth cueing can be applied to both modes to layer the effects
![]()