 Adding plants to the design
|
Tool |
Workspace: Tool set |
|
Plant
|
Design Suite: Site Planning Landmark: Softscape |

Unlike some plug-in objects that allow placement of unstyled instances, every plant object in the drawing is based on a plant style selected from the Tool bar or the Landmark Style Manager. However, individual parameters can be set by style or by instance. See Concept: Plant styles for more information about different approaches to selecting a plant style.
In addition to the appearance and parameters defined for plants, the Plant tool can place plants in several configurations, from single plants to arrays of plants. When setting parameters after placement, an array of plants is considered to be a single plant object in the Object Info palette. Plants can also be created by drawing a polyline and then selecting the Create Objects from Shapes command (see Creating objects from shapes).
When a plant is placed over a site model, it's automatically sent to the site model surface, as long as the plants and site model are in the same file (they cannot be referenced).
See Concept: Plant styles for a discussion of the relationship between plant styles and the settings for an individual plant instance.
|
Mode |
Description |
|
Standard Insertion
|
Inserts a plant according to the selected placement mode |
|
Pick Up
|
Picks up the style and parameter settings of the selected plant, for placement with Standard Insertion or Convert mode |
|
Convert
|
Uses the active plant style and drawing mode to convert a polyline, polygon, rectangle, circle, or arc into a plant object |
|
Plant Style |
Opens the Select Plant Style dialog box to select a resource for placement |
|
Single Plant Placement
|
Places a single specified plant at each mouse click
|
|
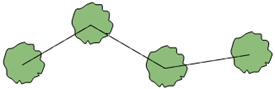
Poly-Vertex Placement
|
Places plants at each clicked polyline vertex; Bezier Vertex and Cubic Vertex submodes only place a plant at the start and end of the polyline, and therefore are not recommended for use with this mode
|
|
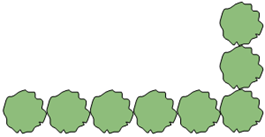
Poly-Edge Spaced
|
Places plants along the drawn polyline at the Spacing distance specified in the style or preferences
|
|
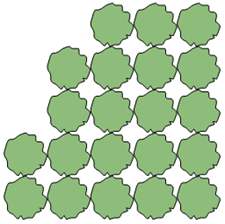
Rectangular Array
|
Fills the drawn polyline with plants in a rectangular array at the Spacing distance specified in the style or preferences
|
|
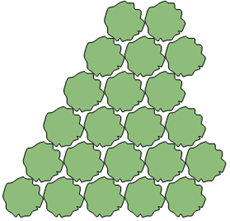
Triangular Array
|
Fills the drawn polyline with plants in a triangular array at the Spacing distance specified in the style or preferences
|
|
Hedge
|
Enables hedge creation for the Poly-Edge Spaced, Rectangular Array, and Triangular Array placement modes. When toggled on, creates rows of hedges along the drawn polyline; the number of hedge rows is set in the Preferences. The Hedgerow tool creates a hedgerow composed of mixed plants (see Creating a hedgerow).
|
|
Polyline creation options |
For Poly-Vertex Placement, Poly-Edge Spaced, Rectangular Array, and Triangular Array modes, selects the method for drawing the object's path polyline; see Creating polylines |
|
Preferences
|
Opens the Plant Preferences dialog box; see Plant settings |






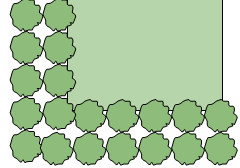

To place plants on the drawing:
Click the tool and placement modes.
Do one of the following:
Click Plant Style on the Tool bar to open the Select Plant Style dialog box. Click a resource to edit it. Click Select to choose it.
Click to show/hide the parameters.Click to show/hide the parameters.
|
Parameter |
Description |
|
Search |
Enter text in the search box to filter the list |
|
Saved Settings Options |
See Using saved sets to save and apply saved settings |
|
Filters |
Select one or more filters for the list; when a filter is set for one of the categories, a red asterisk displays on the filter label. Click More Filters to select which filters should display on the list. Click Clear All Filters to delete the selected filters. |
|
Data/Content |
To select a Vectorworks default plant based on its species, use the Data category. To select a more conceptual plant based on its graphics or a plant style in a custom library, use the Content category. |
|
Parameter pane |
Click a style to open its parameters in the panel on the right, and then adjust any by instance settings as needed before placement. To edit or replace plant graphics, see Editing plant style graphics aor Replacing plant style graphics. A selected set of parameters is available; to set others, click Preferences on the Tool bar and see Plant settings. If the dialog box is reduced in size, the panel slides in and covers part of the dialog box, so it fits on the screen. |
|
Duplicate |
Copies the selected style |
|
Edit Style |
Opens the Edit Plant Style dialog box to edit the style itself; editing the style affects all plants in the file that use the style |
Click Preferences to open the Plant Preferences dialog box and specify the default values of instance parameters, if needed.
To use a style that's already in the file, in the Landmark Style Manager (see Landmark Style Manager), click the Menu icon beside the style to use, and select Place This Plant Style. The Plant tool is activated, with the style selected for immediate placement in the drawing.
The parameters can be edited later from the Object Info palette.
Place the plants using one of the following methods:
In Standard Insertion mode, depending on the placement method selected, either click in the drawing to place a single plant, click to set vertices, or draw a polyline. As the Plant tool is clicked in the drawing, a preview of the plant spread is displayed to help with plant placement.
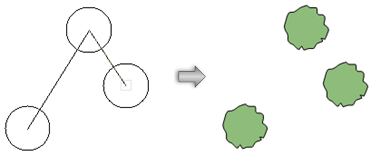
In Convert mode, valid objects are highlighted as the cursor moves over them. Click on a valid object to place the plant. According to the placement settings, the plant follows the path of, or fills, the object.
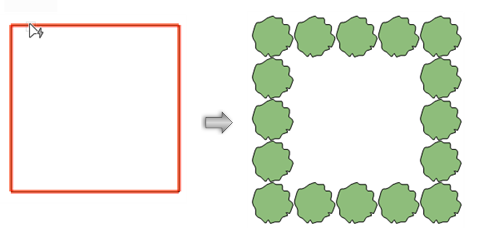
The plant style is added to the current file's resource library when it is placed in the drawing. It can be accessed from the Landmark Style Manager, the Resource Manager, and the Resource Selector, and can be edited like any other plant style. See Editing plant styles.
Plant instances can be edited from the Object Info palette later.
