 Creating and editing landscape area styles
Landscape area styles save all the settings for a landscape area, including the category, plant mix, components, graphics, sustainability metrics, attributes, and more, into a resource that can used later and shared with other files or team members. They are accessed from the Resource Manager and the Landmark Style Manager.
Creating a landscape area style
|
Command |
Path |
|
Create Plug-in Style |
Tools Context menu |
To create a landscape area style:
Do one of the following:
From the Landmark Style Manager with the Landscape Area Style filter active, click New Landscape Area Style.
From the Landmark Style Manager, click the Menu icon  beside an existing landscape area style in the file that has settings similar to those needed for the new style, and select Duplicate Landscape Area Style. Name the new style, and edit the settings as needed.
Select an unstyled instance in the drawing, and select the command, or select New Plug-in Style from Unstyled Plug-in from the Style list on the Object Info palette. Alternatively, right-click on the instance, and select New Plug-in Style from Unstyled Plug-in from the context menu.
From the Resource Manager, right-click on an existing landscape area style in the file that has settings similar to those needed for the new style, and select Duplicate from the context menu. Name the copy, then right-click it in the Resource Manager, and select Edit from the context menu.
Click Landscape Area Style on the Tool bar. The Select Landscape Area Style dialog box opens; click a resource to select it, and then either make the object unstyled and click New Style or click Duplicate.
The Landscape Area Style dialog box opens; it if was created based on an unstyled object or other style, it's populated with the parameter values from the source.
Enter the style name. While the prefix and suffix used in the name formula may be shared among styles, the complete style name must be unique.
Specify the parameter values as described in Landscape area settings. For each parameter, click the By Style/Instance button and toggle to the desired setting.
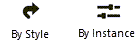
For style parameters, the value is fixed for every object that uses this style and cannot be edited from the preferences or settings dialog boxes or Object Info palette. Instance parameters set here are the default values for newly placed instances; they can be edited for each instance from the settings dialog box and from the Object Info palette.
In addition to object-specific parameter settings, you can control some plug-in object style settings regardless of the object type, such as whether the plug-in object is a window or title block border.
To set visibility-related options including the plug-in style's class and the 2D component and cut plane display, see Additional plug-in object style and instance options.
For plug-in object styles that use 2D components, you can define the components as part of the style; see Creating 2D components for symbol definitions and plug-in objects.
Editing landscape area styles
To edit a landscape area style:
Do one of the following:
Edit a style or batch edit multiple styles in the Landmark Style Manager; see Landmark Style Manager.
From the Landmark Style Manager, click the Menu icon beside the style to edit, and select Edit Style with Dialog Box.
From the Landscape Area Preferences or Landscape Area Settings dialog box, click Edit Style.
From the Resource Manager, right-click on the style to edit, and select Edit from the context menu.
Click Landscape Area Style on the Tool bar. The Select Landscape Area Style dialog box opens; click a resource to select it, and then click Edit Style.
Edit the parameters as described in Landscape area settings.
