 Specifying
Hardscape Joint Patterns
Specifying
Hardscape Joint Patterns
Specifying
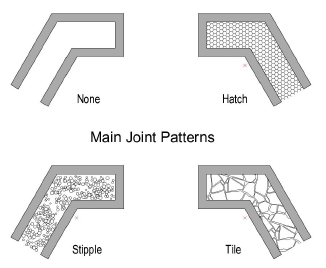
Hardscape Joint PatternsThe Vectorworks Landmark program offers a variety of joint pattern options from the Hardscape Object Settings dialog box (see Creating Hardscape Objects). Available options depend on which component of the hardscape is selected.
Hatch, stipple, and tile joint patterns are available for both the main and border hardscape areas.
To specify a hatch, stipple, or tile joint pattern, select the resource type from the Joint Pattern list.
The Choose Fill dialog box opens.
Click Pick a Resource to open the Resource Selector; double-click a resource to activate it.
Click OK.
The selected resource’s name displays beneath the Joint Pattern list.
If Flagstone, Pavers-Grid, or Pavers-Running is selected for the main joint pattern, the Set Joint Pattern Options dialog box opens. Set the parameters and click OK.
► Click to show/hide the parameters.

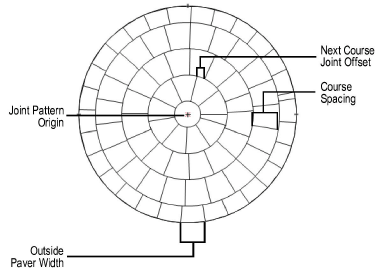
If Pavers-Radial is selected for the main joint pattern (Boundary Configuration required), the Set Radial Pattern Options dialog box opens. Set the parameters and click OK.
Radial pavers can be used with any shape hardscape that has a Boundary Configuration. The hardscape boundary clips the circular pattern to fit.
► Click to show/hide the parameters.
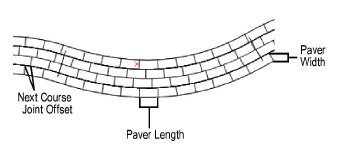
If Pavers-Curved Path is selected for the main joint pattern (Pathway Configuration required), the Set Curved Path Pattern Options dialog box opens. Set the parameters and click OK.
► Click to show/hide the parameters.
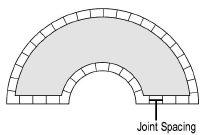
If Spaced Joints is selected for the border joint pattern, the Enter Value dialog box opens. Enter the desired joint spacing value and click OK.
~~~~~~~~~~~~~~~~~~~~~~~~~
