 Placing hoistsPlacing hoists
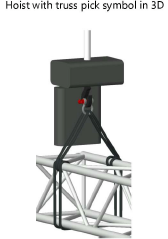
Hoists connect hanging locations, such as house rigging points, structural members, and trusses, to the rigging that hangs from them. Use the Hoist tool to select a hoist symbol and place it in the drawing. Hoists can snap to structural members and rigging objects such as trusses; see Placing a hoist on a rigging object or structural member. Hoists can also snap to house rigging points, and automatically connect to trusses located directly below those points; see Placing a hoist on a house rigging point. The workflow varies depending on the objects to connect.
When bridles are needed, the Bridle tool can insert a hoist as the down leg; the Hoist tool is not needed for this operation.
|
Mode |
Description |
|
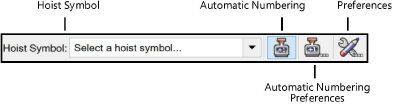
Hoist Symbol |
Opens a Resource Selector to select a hoist for placement; double-click a resource to activate it |
|
Automatic Numbering |
Enables automatic numbering of hoists as they are placed |
|
Automatic Numbering Preferences |
Set the default parameters for automatic numbering of hoists |
|
Preferences |
Opens the object properties dialog box to specify the default parameters |
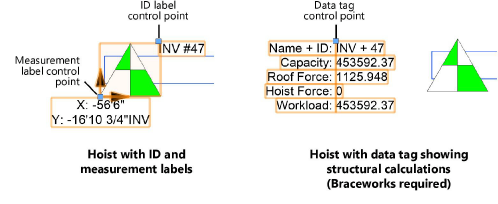
Optionally, hoists can display an ID label and a measurement label. Use the Data Tag tool to add a detailed label after placing the hoist; see Using data tags.
|
Tool |
Tool set |
|
Hoist
|
Rigging |
Hoists can automatically connect to structural members and rigging objects. (For a list of rigging objects, see Concept: Rigging objects).
To place a hoist on a structural member or rigging object:
1. Click the tool, and then click Hoist Symbol on the Tool bar. From the Resource Selector, double-click a resource to activate it.
2.To automatically number hoists as they are placed, click Automatic Numbering, and then click Automatic Numbering Preferences to set the Automatic numbering preferences.
3.Click Preferences to open the object properties dialog box and specify the tool’s default parameters. The parameters can be edited later from the Object Info palette.
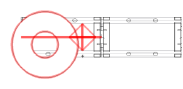
4.Click in the drawing to place the hoist. Valid connection points are highlighted as the cursor moves over them.

The Hoist properties can be edited from the Object Info palette.
|
Tool |
Tool set |
|
Hoist
|
Rigging |
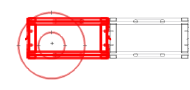
A hoist can be placed on a house rigging point and automatically connect to a truss below that point. To create a valid connection, the house rigging point must be near the centerline of the truss, and the offset must not exceed half of the truss width.
To place a hoist on a house rigging point and connect to an existing truss:
1. Click the tool, and then click Hoist Symbol on the Tool bar. From the Resource Selector, double-click a resource to activate it.
2.To automatically number hoists as they are placed, click Automatic Numbering, and then click Automatic Numbering Preferences to set the Automatic numbering preferences.
3.Click Preferences to open the object properties dialog box and specify the tool’s default parameters. The parameters can be edited later from the Object Info palette.
4.Do one of the following:
● Hover the cursor over a house rigging point; the house rigging point is highlighted. If a truss can be connected by hoist to the house rigging point, the truss is highlighted too.
● Hover the cursor over the truss to support; the hoist insertion point is highlighted. Move the cursor near a house rigging point. If the house rigging point can be connected by hoist to the truss, the house rigging point is highlighted too.
5.Click on the house rigging point to place the hoist. The hoist is inserted on the centerline of the truss and connected to the house rigging point.
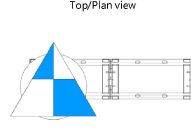
When running structural calculations (Braceworks required), the house rigging point label displays the forces applied to its connected hoist.
The Hoist properties can be edited from the Object Info palette.
~~~~~~~~~~~~~~~~~~~~~~~~~

