Mapping gradient fills
Once a gradient is applied to an object, the fill can be customized to display as desired for that object without affecting the underlying resource. This customization can be done using either the Fill Settings popover on the Attributes palette or the Attribute Mapping tool. If an object’s fill is edited with the Attribute Mapping tool, the changes are reflected on the settings popover on the Attributes palette. Conversely, edits made on the Attributes palette are reflected in the mapping tool’s editing object.
Mapping gradient fills with the Attributes palette
To customize the gradient's display for a selected object:
Select one or more objects containing the same gradient fill.
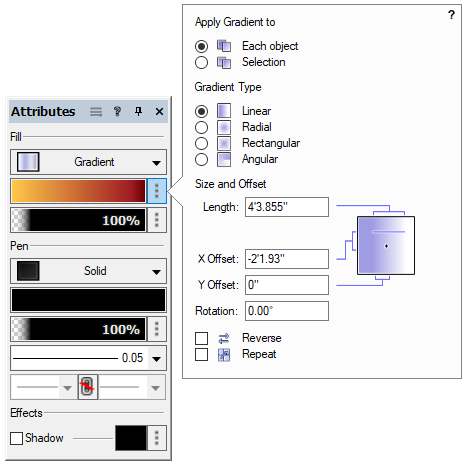
Click Fill Gradient Settings on the Attributes palette.
The popover opens.
Click to show/hide the parameters.Click to show/hide the parameters.
|
Parameter |
Description |
|
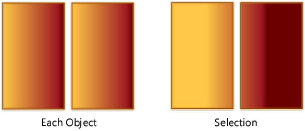
Apply Gradient to |
Select Each object to apply the gradient to each selected object individually; choose Selection to apply the gradient across the selected objects, spanning the objects.
When applying a gradient across several selected objects, group the objects to retain the effect. |
|
Gradient Type |
Select the gradient type from the list |
|
Linear |
Applies the gradient to the selection with linear geometry
|
|
Radial |
Applies the gradient to the selection with circular geometry
|
|
Rectangular |
Applies the gradient to the selection with rectangular geometry
|
|
Angular |
Applies the gradient to the selection in a counterclockwise direction from the specified starting point
|
|
Size and Offset |
|
|
Length |
Specifies the length of a single gradient segment (in the file’s current units) |
|
X/Y Offset |
Indicates the gradient starting point coordinates relative to the center of the selection bounding box (in the file’s current units) |
|
Rotation |
Specifies the rotation of the gradient fill |
|
Reverse |
Draws the colors in reverse order from the order specified in the Gradient Editor dialog box |
|
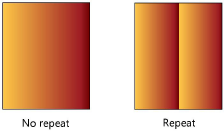
Repeat |
Repeats the gradient segment over the object; deselect to apply a single instance of the gradient segment to the object
|


Changes to the object's gradient display in the selected object as you adjust the parameters.
After setting the parameters, click anywhere outside the popover to accept the settings.
Mapping gradient fills with the Attribute Mapping tool
|
Tool |
Tool set |
Shortcut |
|
Attribute Mapping
|
Basic Visualization |
Shift+A (Windows) Option+A (Mac) |

To modify an object’s gradient fill:
Click the tool.
Click an object containing a gradient fill. Only one object at a time can be edited. An editing object with two handles is placed over the gradient.
Use the editing object to set the gradient origin location, i-axis length, and rotation angle. Press the Shift key while dragging to constrain the editing object line. The fill can also be nudged.
|
Action |
Description |
|
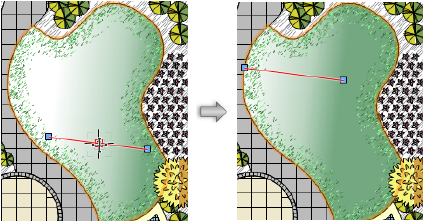
Edit the location of the fill (gradient origin) |
Click and drag the editing object to the desired location. Click to set.
|
|
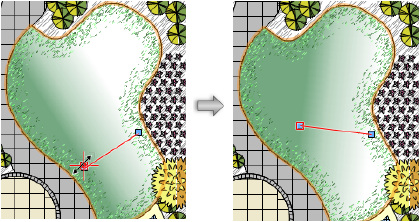
Edit the gradient i-axis location |
Click a handle at the end of the editing object, and drag to change the length of the object. Click to set.
|
|
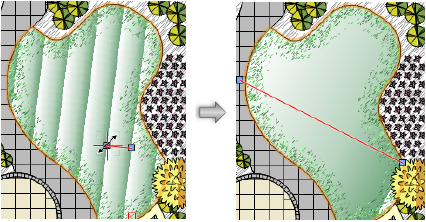
Edit the gradient rotation |
Click a handle at the end of the editing object, and drag to create a fulcrum line. Click to set the rotation.
|