 Setting Showcase preferences
|
Command |
Workspace: Path |
|
Showcase Preferences |
Design Suite: Entertainment > Spotlight Settings Spotlight: Spotlight > Spotlight Settings |
Associate a physical or virtual console that produces DMX data to the Vectorworks session, optionally specify PSN origin coordinates, and set up rendering parameters that apply when Showcase is active.
To set Showcase preferences:
Select the command.
The Showcase Preferences dialog box opens. Set the default Showcase parameters.
Click to show/hide the parameters.Click to show/hide the parameters.
|
Parameter |
Description |
|
DMX Data Provider |
Associate Showcase with a physical or virtual console that produces DMX data; select the communication protocol used to control the intelligent lighting fixtures |
|
Options (MA-Net3 only) |
Opens the DMX Data Provider Options dialog box, to specify the MA-Net3 protocols. Select the Network Interface that provides the connection to the console, and the MA-Net3 Version. If you select the Updater version, the MA-Net3 Updater dialog box opens automatically when exiting the preferences, to update the MA-Net3 version. |
|
PSN Origin |
PosiStageNet (PSN) is an open source protocol that allows both pre-programming and active control of object movement and rotation. Specify the X,Y, and Z PSN origin world coordinates, to align the automation origin with the Vectorworks internal origin. See PSN and DMX transforms for scene objects. |
|
Render Options |
Set the rendering options that apply during a Showcase session; default parameter settings are appropriate for previz. These settings do not affect shaded rendering outside of Showcase. |
|
Hide lighting device geometry (faster) |
Since previz normally occurs in a dark interior environment, displaying each moving lighting device's geometry is not typically necessary. Hiding the moving lighting device geometry is recommended for faster rendering. |
|
Enable shadows |
Normally, shadows are off for previz; however, select the option to enable shadows if needed, and then select the Shadow Quality. Lower shadow quality results in faster rendering. |
|
Shaded Options |
If needed, shaded options can be set specifically for the Showcase shaded rendering. The Showcase Shaded Options dialog box opens; see Shaded options. In particular, the Exposure and Bloom parameters on the Camera tab may require adjustment for realistic rendering of the lighting device output. |
|
Ambient Brightness (%) |
Ambient lighting simulates the house lights in an indoor scene or the natural lighting in an outdoor scene. To control the brightness of ambient light throughout the scene, drag the slider to the right to increase the brightness, or enter a brightness percentage. |
|
Lighting Options |
If needed, lighting options can be set specifically for the Showcase rendering. The Showcase Lighting Options dialog box opens; see Setting lighting options. |
|
Background |
Select a Renderworks background to use for the Showcase rendering (in particular, for lit fog effects) |
|
Lit fog |
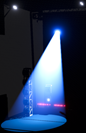
Select the option to create volumetric lighting effects, such as a shaft of light in fog, haze, or smoke
|
|
Lit Fog Density (%) |
To control the the fog density, drag the slider to the right to increase the density, or enter a density percentage |
|
Background Options |
If needed, adjust the background options for the Showcase rendering. The Edit Renderworks Background dialog box opens; see Creating Renderworks backgrounds. |
Connecting to MA-Net3
Using the MA viz-key, you can connect to a grandMA3 console or onPC computer and join an MA-Net3 session. First, install the viz-key driver and update Showcase preferences to communicate with the specific version of grandMA3 software that you will use for visualization. Once the update is complete, you can select the desired grandMA3 software version in Showcase, and connect to the MA-Net3 network.
The grandMA3 must use the same grandMA3 software version to visualize a show.
Configuring the viz-key connection
To install the viz-key driver and update Vectorworks to communicate with your grandMA3 software:
Select MA-Net3 for the DMX Data Provider in the Showcase Preferences dialog box.
Click Options.
The DMX Data Provider Options dialog box opens. Select Updater from the MA-Net3 Version list.
The MA-Net3 Updater dialog box opens automatically when exiting the preferences, to update the MA-Net3 version.
Follow the instructions for installing and updating the viz-key driver in the following article: forum.vectorworks.net/index.php?/articles.html/articles/connect-grandma-to-vision-2021-r837/.
Once you have run the updater for the grandMA3 software, that version becomes an option in the Select MA3 Software Version dialog box, as described in the following section.
Joining an MA-Net3 session
Once you have completed the steps in the previous section, Showcase can join an MA-Net3 session.
To join an MA-Net3 session:
Select MA-Net3 for the DMX Data Provider in the Showcase Preferences dialog box.
Click Options.
The DMX Data Provider Options dialog box opens. Select the desired version of grandMA3 software from the MA-Net3 Version list.
Follow the instructions for connecting to specific versions of the grandMA3 software in the following article: forum.vectorworks.net/index.php?/topic/45676-dmx-connectivity-articles/
