 Door and window assembly settings
These settings are available in the following locations:
Door and Window Assembly Preferences dialog box (creating an object)
Door and Window Assembly Settings dialog box (editing an object)
Object Info palette (editing an object)
Door and Window Assembly Style dialog box (creating or editing a style)
You can create plug-in objects with a combination of parameters that are determined by style and/or by instance, and then optionally save them as a plug-in object style. Style parameters have a fixed value established by the style; instance parameters can be set independently for each instance of the object in the drawing (see Concept: Plug-in object styles). If a door and window assembly style is selected, only parameters set by instance can be edited.
Additional plug-in object settings for the class, the 2D component and cut plane display, and wall insertion options are available; see Additional plug-in object style and instance options. For assemblies, wall closures are often excluded from the bottom by default, since many assemblies include doors; that setting can be adjusted here.
Materials and classes can be set for individual assembly parts, on the appropriate panes. If a material resource is used to define a part, the material typically provides the fill, texture, physical attributes, and construction information needed for drawings, renderings, and reports. The class controls the part's appearance and visibility. The visibility of the overall 3D assembly is controlled by the Class setting from the Object Info palette.
The parameters described here establish the default settings for objects within the assembly, such as the door and window units and mullions, but you can edit many by instance settings for individual parts after placement by editing the assembly layout. See Editing a door and window assembly layout.
Door and window assembly settings: Overall
Click to show/hide the parameters.Click to show/hide the parameters.
|
Parameter |
Description |
|
Use Style |
From the Resource Selector, double-click a resource to activate it, or click Unstyled. If a styled object is converted to unstyled, the current values are retained, but all parameters are set to By Instance to allow editing. |
|
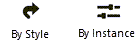
By Style/Instance |
A graphic indicates whether each parameter is set to By Style and given a fixed value or set to By Instance and editable in the dialog box. An object style may have a combination of both settings, to balance the need for consistency and flexibility. By Style/Instance settings are established by the style and cannot be changed from the settings dialog box.
To edit the object style, see Editing plug-in object styles; editing the style modifies all plug-in objects in the file that use the style. |
Door and window assembly settings: General pane
Click to show/hide the parameters.Click to show/hide the parameters.
|
Parameter |
Description |
|
Edit Door and Window Assembly Layout |
Opens object editing mode, to edit the assembly layout for an assembly style or an already placed assembly; see Editing a door and window assembly layout |
|
Size Reference |
Select the appropriate option to define the overall assembly width and height; the Size Reference selection automatically updates the Overall Width and Overall Height fields, but does not change the size of the assembly. Overall Frame represents the overall width and height of the assembly unit itself, not counting the shim gap. Rough Opening represents the current overall assembly width and height, including the shim gap. |
|
Overall Width/Height |
The width/height of the assembly based on the Size Reference selection |
|
Elevation in Wall |
Enter the assembly elevation (based on the selected reference point) |
|
Elevation Reference |
Select either the top or bottom of the frame as the elevation reference point |
|
Insert Relative to |
Specify whether the assembly's insertion point is relative to the exterior face, center, or interior face of the frame. This determines how the entire assembly fits within a wall; you can change the insertion options for individual parts within the assembly by editing the assembly layout after placement. The Use unit-provided frames setting on the Frames pane also determines how this postion works, especially if door and window units provide frames of different depths. In that case, the assemblies inserted relative to the interior or exterior face of the frame are aligned by default to the inner-most or outer-most frame of all the units, which may result in undesired alignment. Additional wall insertion options are available, as described in Additional plug-in object style and instance options. |
|
Create niche for space objects |
Creates niche geometry that space objects can include in their net boundary areas; see Space settings: 2D Boundaries and Area pane |
|
Interior Side |
Select which side of the wall the assembly considers the interior side, for the purpose of defining handing- and location-related settings such as sash, sill, hinge, and trim location and open direction. This is related to the assembly settings only and does not change the wall's direction; see Wall direction. Doors and windows within an assembly can't have their own interior side settings; they adhere to the assembly's setting. |
|
Unit Offset Reference |
Select whether the offset for units such as doors and windows within the assembly is relative to the exterior face, center, or interior face of the assembly frame. The Use unit-provided frames setting on the Frames pane also determines how this offset reference works, especially if door and window units providing their own frames have frames of different depths. For symbol units, the insertion point is placed relative to the selected offset reference. |
|
Default Panel Style |
Select the default panel style to fit between frames and mullions; from the Resource Selector, double-click a resource to select it, or click Unstyled. This option is used when a unit within the assembly can't fit within the shape provided by the assembly. For example, a door within an assembly can't adhere to a non-rectangular shape; if a frame or mullion is changed to create a non-rectangular shape, the door object is replaced with a panel of this style. |
Door and window assembly settings: 2D Visualization pane
Click to show/hide the parameters.Click to show/hide the parameters.
|
Parameter |
Description |
|
2D Graphics |
|
|
Draw wall lines |
Displays wall lines at all times. Regardless of this setting, assembly wall lines are always placed in the Header visibility class (which is set to Ceiling-Main by default), to easily create reflected ceiling plans. |
|
Centerline marker |
Displays a centerline marker; enter the marker's Size |
|
Clerestory |
When the entire assembly is above or below the cut plane, displays a simplified dashed representation of the assembly, with no wall break |
|
Cut Plane Elevation |
Enter the cut plane elevation for Top/Plan views |
|
2D Attributes |
Sets the Top/Plan visibility and attributes for the assembly parts. Select one or more rows, and click the applicable columns to select the desired settings. Only rows set by instance can be edited here. To control appearance and visibility, select a class from the list of classes present in the drawing, or create a new class. Select <Assembly Class> to place the part in the same class as the assembly object. Set custom pen and fill attributes, or select an option to control them by object (from the Attributes palette) or by class. |
Door and window assembly settings: Frames pane
Click to show/hide the parameters.Click to show/hide the parameters.
|
Parameter |
Description |
|
Use unit provided frames |
When selected, door and window units within the assembly that create frames generate their own frame geometry. In this case, the assembly's frame segments do not provide geometry, but are used only for attaching objects. This setting affects the behavior of other settings, such as Insert Relative to and Unit Offset Reference on the General pane and Location in Assembly on the Default Mullions pane. Select this option to create an assembly with mulled units, for example, but deselect it to create a storefront assembly. This parameter should be set when creating the assembly and not changed later, as changing it for an existing assembly can lead to unexpected results. |
|
Frame Width |
When unit-provided frames are not used, and when all the frames in an existing assembly have the same width, the values display. If the frames' widths vary, these display in a mixed state. When the assembly is created from door and window objects, assembly-provided frames measure the specified width outward from the inside frame of the door/window units. For assembly-provided frames, each frame segment can have a different width. |
|
Frame Depth |
When unit-provided frames are not used, and when all the frames in an existing assembly have the same depth, the values display. If the frames' depths vary, these display in a mixed state. When assembly-provided frames are used, all frame segments have the same depth. |
|
Use wall depth |
Sets the frame depth to the overall wall depth |
|
Use frame extension |
Specifies a frame extension to fill any gap between the interior face of the frame and the interior face of the wall; enter the desired Frame Extension Width |
|
Shim Gaps |
Sets the distance between the frame and the rough opening for each side of the assembly |
|
Use wall provided gaps |
Sets the gap on all four sides to those specified by the wall closure profile offsets, calculated with the assembly's Size Reference from the General pane; see Wall closure settings |
|
Left/Right/Top/Bottom |
When wall-provided gaps aren't used, enter the gap value for each of the four sides, or click the Link button to match the gap to the one above it |
|
Masonry Module |
Enter the brick or masonry unit size that determines the masonry opening in the wall |
|
3D Attributes |
Lists all parts that can be assigned an individual material, class, and texture. Interior and exterior sides can be set separately. Two By Style columns indicate whether the part's material is set by style or instance, and whether the class and texture are set by style or instance. Select one or more rows, and click in a column to do any of the following: Select a material from the Resource Selector. To control appearance and visibility, select a class from the list of classes present in the drawing, or create a new class. Select <Assembly Class> to place the part in the same class as the assembly object. Select a texture from the Resource Selector, or click one of the buttons to use no texture, to use the class texture, or, if the selected item's material texture was previously overridden, to revert to the material's texture. |
Door and window assembly settings: Default Mullions pane
Establish the settings used by default when mullions are first added to an assembly; you can edit the settings for individual mullions later, when editing the assembly layout; see Edit Frames and Mullions mode.
Click to show/hide the parameters.Click to show/hide the parameters.
|
Parameter |
Description |
|
Default Mullion Style |
Optionally, select the default style for newly created mullions. Selecting a style before placement sets and disables the default mullion options below; however, the settings can be changed for individual mullions later. |
|
Mullion Width/Depth |
Enter the default width (when available) and depth of the mullions. Because the mullion width is determined by the distance between doors and windows when the assembly is created, it can't be set before placement, but can be edited afterward. |
|
Use frame depth for mullion depth |
Sets the mullion depth to the assembly's frame depth |
|
Show cap |
Places a cap on the mullion's exterior face; enter the Cap Depth |
|
Location in Assembly |
Select the location of the mullion relative to the assembly frame. The frame and mullion both use the selected alignment point; that is, if Center of Assembly is selected, the center of the mullion is aligned to the center of the frame, and if Exterior Face of Assembly is selected the exterior face of the mullion is aligned to the exterior face of the assembly. The Use unit provided frames setting on the Frames pane also determines how this location works, especially if door and window units provide frames of different depths. In that case, mullions located by the interior or exterior face of the assembly are aligned by default to the inner-most or outer-most frame of all the units, which may result in undesired alignment. |
|
Offset in Assembly |
Enter the mullion's offset from the Location in Assembly; a positive value offsets the mullion toward the exterior side, and a negative value offsets the mullion toward the interior side |
|
2D Attributes |
Sets the Top/Plan visibility and attributes for the mullion parts. Select one or more rows, and click in a column to select the desired settings. Only rows set by instance can be edited here. To control appearance and visibility, select a class from the list of classes present in the drawing, or create a new class. Select <Mullion Class> to place the part in the same class as the mullion object. Set custom pen and fill attriibutes, or select an option to control them by object (from the Attributes palette) or by class. |
|
3D Attributes |
Lists all parts that can be assigned an individual material, class, and texture. Interior and exterior sides can be set separately. Two By Style columns indicate whether the part's material is set by style or instance, and whether the class and texture are set by style or instance. Select one or more rows, and click in a column to do any of the following: Select a material from the Resource Selector. To control appearance and visibility, select a class from the list of classes present in the drawing, or create a new class. Select <Mullion Class> to place the part in the same class as the mullion object. Select a texture from the Resource Selector, or click one of the buttons to use no texture, to use the class texture, or, if the selected item's material texture was previously overridden, to revert to the material's texture. |
 Door and window assembly settings: Energos pane
Doors, windows, and door and window assemblies play a critical role in energy analysis calculations. Energy is lost through the glass, and when doors are opened, but energy is also gained by solar radiation through the glass. Accurately determining the R-Value/U-Value and the shading factor is essential for the overall energy analysis.
Vectorworks Architect is required to conduct an energy analysis; however, energy-related parameters can be specified here for informational purposes.
Click to show/hide the parameters.Click to show/hide the parameters.
|
Parameter |
Description |
|
Include in calculations |
When selected, the assembly is eligible to be included in energy calculations, depending on the energy analysis settings for layer/class, element inclusion, and so on |
|
R-Value/U-Value |
|
|
Automatic Calculation |
Based on the frame parameters, the assembly R-Value/U-Value is calculated and displayed. This value, along with the shading factors, is critical for a correct assessment of the building envelope in energy calculations. |
|
Manual Input |
Select this option to override the calculated R-Value/U-Value and enter a manual value for the assembly instead. For complex or detailed assembly designs, enter results from a third-party calculation here. |
|
Frame |
Select the thermal properties of the frame. Sets can be created and edited; see Specifying system sets. |
|
Shading |
Select the level of shade for each type of shading near the assembly, or select Custom from any of the lists. The Edit Shading dialog box opens, to manually enter a percentage for when the assembly is in the shade. |
|
General |
Select the general shade conditions where the assembly is located |
|
Surrounding |
Specify surrounding shade conditions that might affect the amount of solar radiation reaching the assembly |
|
Summer Shading |
Specify special shade conditions that apply during the summer months (for example, when nearby deciduous trees shade the assembly) |
|
Additional Shading |
Select any mechanical or passive shading mechanisms in place, or select Custom and enter a shading percentage in the Edit Shading dialog box |
|
Summer Ventilation |
Opens the Summer Ventilation Settings dialog box, to specify summer ventilation options. Type of usage: (ground floor, upper floor, night): Select the type of ventilation system usage, if any, for the assembly. Operable opening width: Indicates the width of the assembly's opening gap for an operable window (which affects the amount of ventilation). |
Door and window assembly settings: Data pane
Certain data fields can't be edited.
Click to show/hide the parameters.Click to show/hide the parameters.
|
Parameter |
Description |
|
Include on schedule |
Turns on the assembly's ID and includes the object in schedule reports |
|
ID Prefix/Label/Suffix |
Enter a label to identify the assembly, and optionally enter a prefix and/or suffix for the label value. This ID information is for data only and is not used in a data tag or label. |
|
Field Name/Field Value |
Data fields are listed under Field Name. Click the Field Value column to enter data for use in the assembly schedule, as needed. |
Door and window assembly settings: Object Info palette
To edit assembly parameters in the Door and Window Assembly Settings dialog box, click Settings from the Object Info palette, or edit many settings directly in the Object Info palette. Most assembly parameters are described in the settings above. Only the parameters that are different in the Object Info palette are described here.
Click to show/hide the parameters.Click to show/hide the parameters.
|
Parameter |
Description |
|
Insert |
Specify where to insert the object relative to the wall, its core component, or its designated insert location. This parameter is also set in the Plug-in Object Style or Plug-in Options dialog boxes; changing it either location automatically changes it in the other. <Nearest Wall Edge on Insertion> places the insertion point on the wall edge closest to the point clicked for insertion. This selection automatically sets the parameter by instance. |
|
Offset |
Enter the offset of the insert perpendicular to the wall's path. This parameter is also set in the Plug-in Object Style or Plug-in Options dialog boxes; changing it either location automatically changes it in the other. |
|
Set Position |
Click to activate the Move by Point tool in Reference Point mode and move the assembly by a specified distance from the reference point |
|
Wall Closure |
For assemblies in a wall, opens the Wall Closure dialog box; see Wall closure settings. Because assemblies can contain both doors and windows, the default closure settings, especially for the bottom, may need to be adjusted for specific assemblies. See Additional plug-in object style and instance options for information on wall insertion options in the Plug-in Object Style or Plug-in Options dialog boxes. |
|
Style |
Replace, remove, or edit the current style, or create a new plug-in object style for this object; see Changing plug-in object styles from the Object Info palette. Editing a style changes all instances in the file that use the style. |
|
Hide style parameters |
Hides the parameters that are set by style; these can't be edited from the dialog box or the Object Info palette |
