Creating a texture
Create custom textures from the Resource Manager, and then apply them to 3D objects to make a model look more realistic.
If you're planning to previsualize your scene with the Vision program, use this workflow to ensure that your textures look realistic in Vision: Preparing High-Quality Textures in Vectorworks for Export to Vision 2021.
To create a texture resource:
From the Resource Manager, click New Resource, select Renderworks Texture, and then click Create. Alternatively, from the Resource Manager, select Renderworks Textures from the list of resource types on the Tool bar, and click New Renderworks Texture.
Alternatively, to base a new texture on an existing texture, right-click the texture in the active file in the Resource Manager and select Duplicate from the context menu.
The Edit Texture dialog box opens. Specify the parameters.
Click to show/hide the parameters.Click to show/hide the parameters.
|
Parameter |
Description |
|
Name |
Specifies the name of the texture resource |
|
Display options |
Depending on the complexity of the texture you're creating, select whether to show a Basic properties set, only the properties that have been Modified from the PBR default settings, or All the available settings. When Basic and All are selected, the properties that have been modified display in bold. |
|
Properties list |
Lists all the properties available for creating a PBR texture and their current values, divided into categories. Properties with (RS) after the name display fully only in Realistic RS render styles; in other render modes/styles, such as Shaded or Realistic, these properties may display only partially or not at all. Click the disclosure arrow to display the properties in each category, and click a property to select it; the appropriate controls for each property display below, depending whether you are using parametric values or an image for that property. See PBR texture properties for descriptions of each property. See academysoftwarefoundation.github.io/OpenPBR/#parameterreference for additional information about OpenPBR textures. |
|
Use parametric values
|
Uses parametric values for the settings for the property selected in the list box; the controls for the selected property display below |
|
Parametric value controls |
Depending on the property selected in the list, the controls may include text entry fields (including some with real-world dimensions), check boxes or radio buttons to select options, sliders to set the intensity of the effect, and color selectors. As you change the settings, the preview updates. |
|
Use image
|
For parameters that can use images, allows the use of an image instead of parametric values for the property selected in the list box. Opens the Choose Image dialog box; select an image for import or an image to reuse from another resource. The image controls display below. Vectorworks supports the following image formats: BMP, JPG, PCT, PNG, PNT, PSD, QTI, SGI, TIF, TGA. Most image-based textures are automatically compressed when imported. Imported JPG files retain the original JPG data; all other image files are compressed using lossless PNG format. Images imported from external sites may increase the file size because of the quality; for high quality files and large files sizes, consider saving an image of reduced size locally before using as part of a texture. |
|
Image controls |
The image displays; use the image controls to manipulate how the image is used for the selected property.
Change Image opens the Choose Image dialog box to select a different image. Image Effects opens the Image Effects dialog box; see Image effects. Remove Image removes the image. Filter Color optionally uses an object fill or a chosen color as a filter; if Use Chosen Color is selected, select the color. |
|
Preview |
The Preview window displays the effects of the settings on a preview object; the preview updates after each edit. For PBR textures, the Resource Manager's resource viewer pane thumbnail view and resource preview pane display the preview as it appears when the dialog box is closed. You can strategically select preview objects to visually categorize texture resources. For example, you can display all metal textures with a gear object, etc. For the best Resource Manager appearance, select a Realistic RS render style before closing the dialog box, regardless of the render style used for the preview while changing the settings. |
|
Object |
Select the type of preview object from the list; the list includes objects designed to showcase different aspects of textures
Changing the preview object from a sphere to walls allows you to confirm the Texture Size is set correctly and to see how the texture repeats |
|
Stage |
Select the stage used for the preview background and lighting |
|
Render Style |
Select the render style for the preview; some render styles include an environment for showing background, refraction, and reflections. Realistic RS render styles fully support PBR texture features and will yield the best results for textures of that type, in the preview and in renderings. However, for textures to be shown in renderings that use Shaded or Realistic render styles, select the appropriate preview. |
|
Texture Size |
Enter the real world size of one horizontal repetition of the texture, or select to set the size by an image used to create the texture. If setting the image by size, enter the Feature Size value in the Set Image Size dialog box, or click and drag the sizing line across the image to interactively set the size. |
|
Texture Type |
Displays whether the texture is PBR or legacy Renderworks |
|
Convert to PBR |
Converts a legacy Renderworks texture to PBR. The conversion can't be undone; consider saving a duplicate of the original texture before converting. When converting a legacy Renderworks texture to PBR, the legacy shaders are mapped and converted as accurately as possible. An alert displays the changes that will be made before you proceed with the conversion. After the conversion, view the Modified properties list to see which PBR properties were converted, and edit additional PBR properties as needed to refine the PBR texture's appearance. PBR to legacy translation is done automatically for support of Renderworks render modes and styles, and when exporting files to previous versions. However, some features are lost in the conversion; this is unavoidable because legacy textures have a more limited set of properties. The results will resemble the PBR texture. |


 Flips the image horizontally.
 Flips the image vertically.
 Rotates the image counter-clockwise.
 Inverts the colors in the image.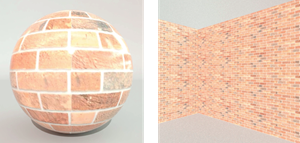
The texture is saved with the file and displays in the Resource Manager.
