Inserting
curtains and borders Inserting
curtains and borders
Inserting
curtains and borders Inserting
curtains and borders Mode |
Tool |
Workspace: Tool set |
Modes for the Polyline tool |
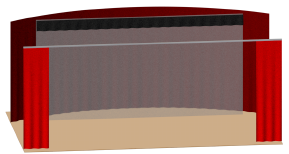
Soft Goods
|
● Designer: Detailing ● Spotlight: Event Design |
The Soft Goods tool creates a curved or straight stage curtain or border. To draw a curtain, either use the Soft Goods tool, or create a polyline and then select the Create Objects from Shapes command (see Creating objects from shapes).
To display hanging points for soft goods objects, enable Hanging Point Classes in the Braceworks preferences (see Braceworks preferences).
To insert a curtain or border:
1. Click the tool and the desired creation mode.
2. Click Preferences to specify the default Soft Goods tool parameters.
The Soft Goods Object Properties dialog box opens.
3. Select either Curtain or Border from the Function list, and specify any other default parameters for this session.
4. Click the desired creation mode for the soft goods object.
The Corner Vertex or Point on Arc modes are recommended. For more information on the polyline drawing modes, see Creating polylines.
5. Click to set the soft goods object’s start point.
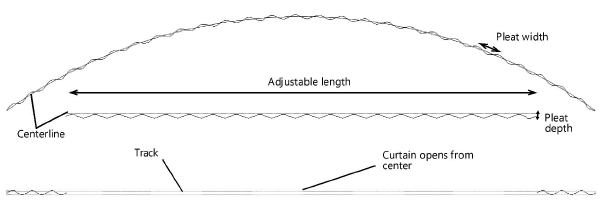
6. Click to set the end of the segment and the beginning of the next. Continue drawing segments in this manner until the curtain or border object is complete, and then double-click.
Once created, the soft goods object can be reshaped by double-clicking on it. The Reshape tool is automatically activated, to reshape the object directly in the drawing.
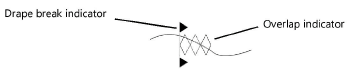
The curtain or border parameters can be edited from the Object Info palette. However, certain parameters are not available for borders.
![]() Click
to show/hide the parameters.
Click
to show/hide the parameters.
~~~~~~~~~~~~~~~~~~~~~~~~~