
Click here for a video tip about this topic (internet access required).
Creating an animated view of your model or design is an essential part of helping your client visualize and understand the project. The four commands in the Model > Create Animation menu allow you to create an animation path object, edit the keyframes to customize camera views and speed, and export a movie file to share. Animations can be viewed in first- and third-person views.
|
|
Click here for a video tip about this topic (internet access required). |
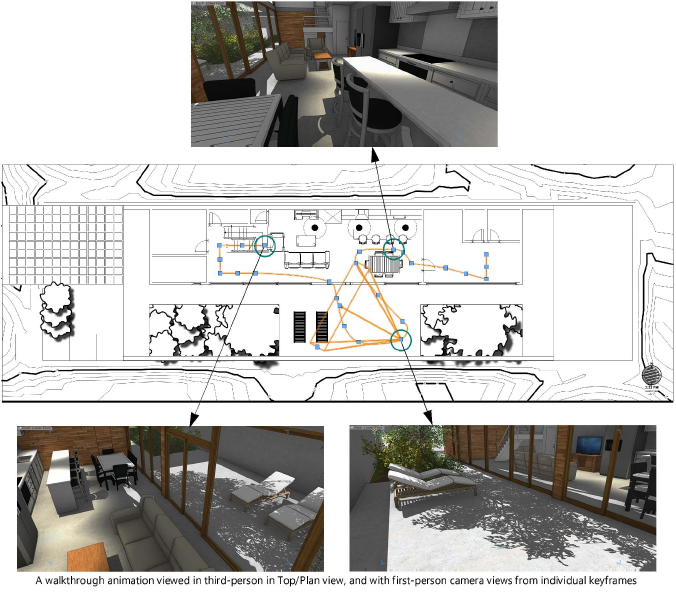
There are fundamentally two kinds of animations: walkthrough animations, in which the camera travels through a model along a defined path, and orbit/spin animations, in which the camera circles a selected object or point.
● Two commands create a walkthrough animation: one converts a 2D or 3D path object and one connects saved views.
● Another two commands create animations that rotate around a selected object: an orbit animation for large objects such as buildings, and a spin animation for small objects such as furniture or machine parts.
Once an animation is created, it can be accessed at any time from the Cameras tab of the Visualization palette; see Managing lights and cameras with the Visualization palette.
Each of the animation commands creates an animation path object. Animation path objects are of different types and dictate different camera behavior depending on how they are created. The object’s Path Type displays in the Object Info palette.
● Fly Freely path types: The camera exactly follows the animation path through 3D space. Fly Freely path types result when you do the following.
● Create a walkthrough animation from a 3D polygon or a NURBS curve.
● Create a walkthrough animation from saved views.
● Create an orbit animation without orthogonal projections.
● Create a spin animation.
● Walk path types: This type of animation path object is designed for use in Top/Plan view. It analyzes the model’s active design layer so that the camera follows the contours of the terrain/slab and can climb stairs. The Camera Height above the model’s surface is set in the Object Info palette. Walk path types result when you create a walkthrough animation from a planar object (a line, arc, polyline, or polygon).
The Walk path type follows the terrain of the active design layer when the animation is run, which may or may not be the layer the animation path object is on.
● Orthographic Orbit path types: The animation path revolves around the selected objects, and keyframes keep the camera always pointed toward the selected objects. This path type cannot be edited or previewed from the Object Info palette. Orthographic Orbit path types result when you create an orbit animation with orthogonal projections.
With a few exceptions, all path types can be edited using the same methods; see Editing animations. Reshaping or modifying a Walk or Orthogonal Orbit type path converts it into a Fly Freely path. Otherwise, you cannot convert one type of path to another type.
The animation path object sets the path and the location and angles of camera views, but it does not preserve visibility settings. Those need to be set as desired before running an animation.
~~~~~~~~~~~~~~~~~~~~~~~~~